Russia
Joined: Aug 13, 2022
Post Count: 623
Status:
Offline
Re: Apartment project with lighting by invisible hemispheres. I continue advertising
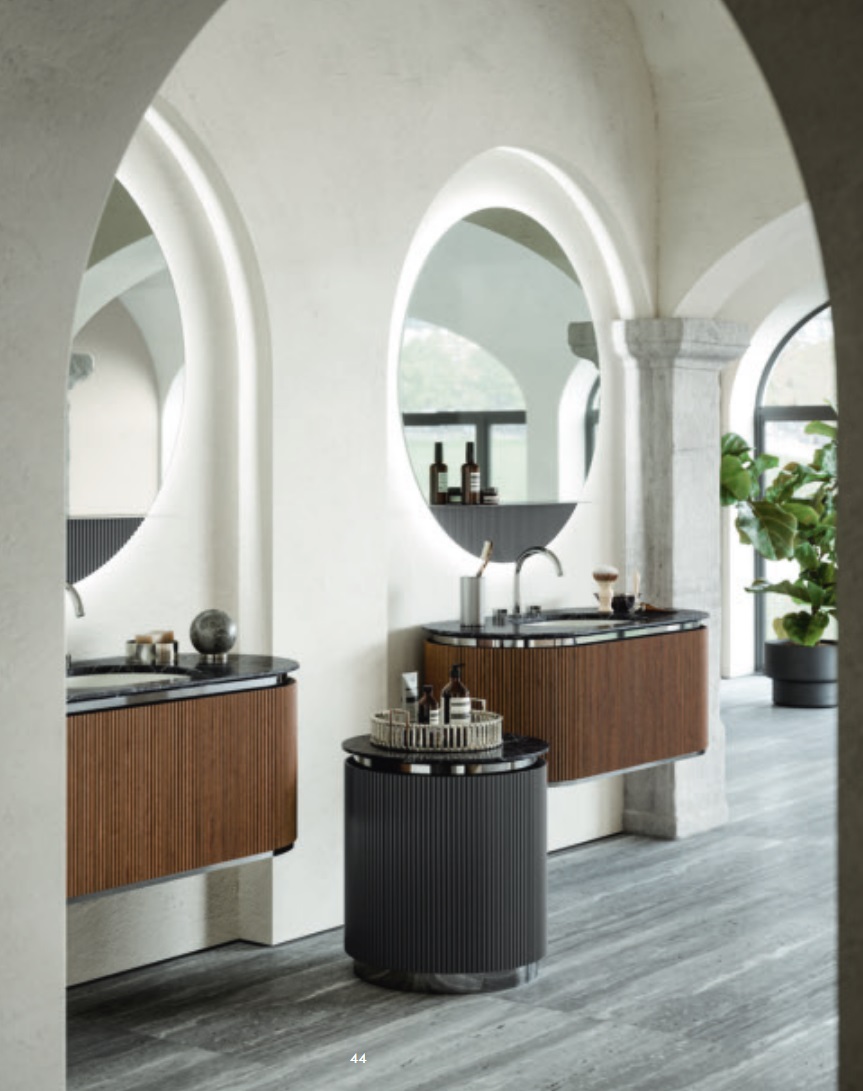
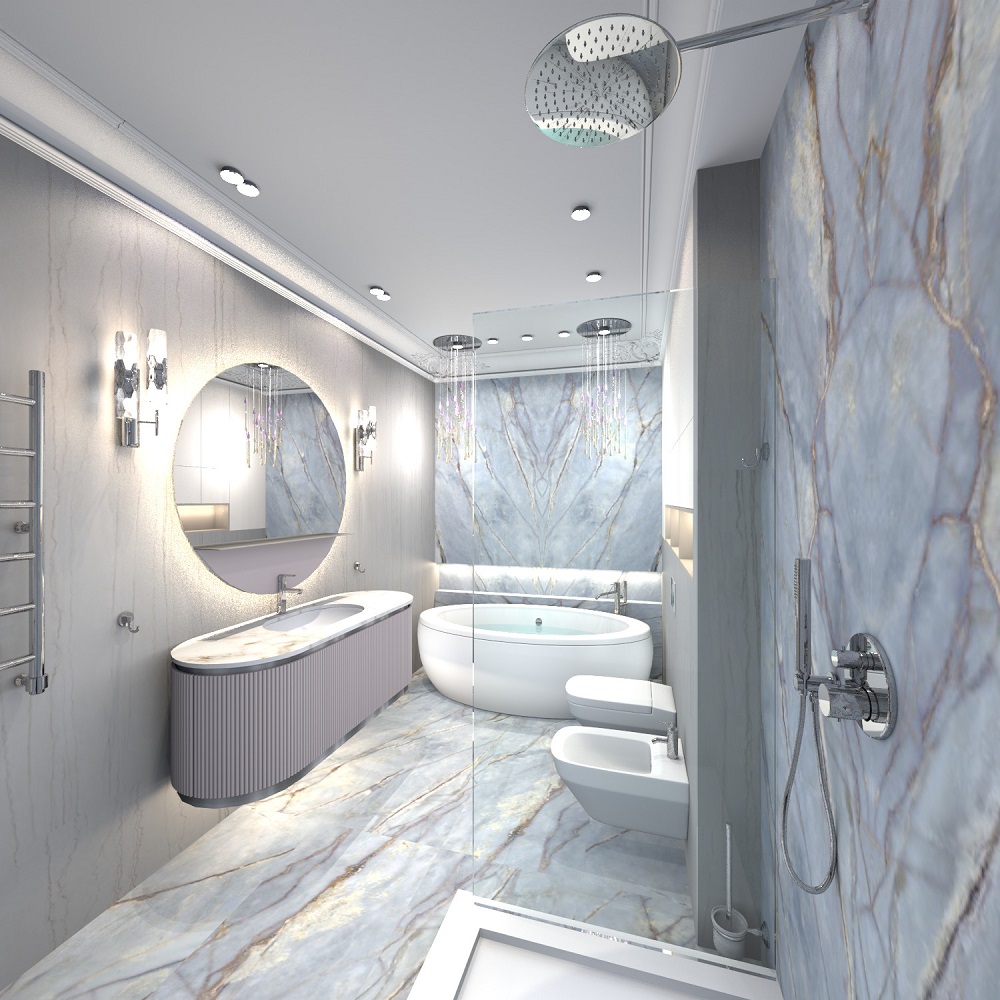
I have small victories. I want to share some secrets with you. If you don't have a model of a cabinet with a sink, you can do everything yourself in SH3D. The main thing is that there are no complex curved volumes, but if the shape of the furniture consists of primitives such as boxes and cylinders, everything is OK. Some surfaces can be made using spheres. But in my case, this was not necessary. I took the Oasis factory furniture, the Naxos collection, for work.
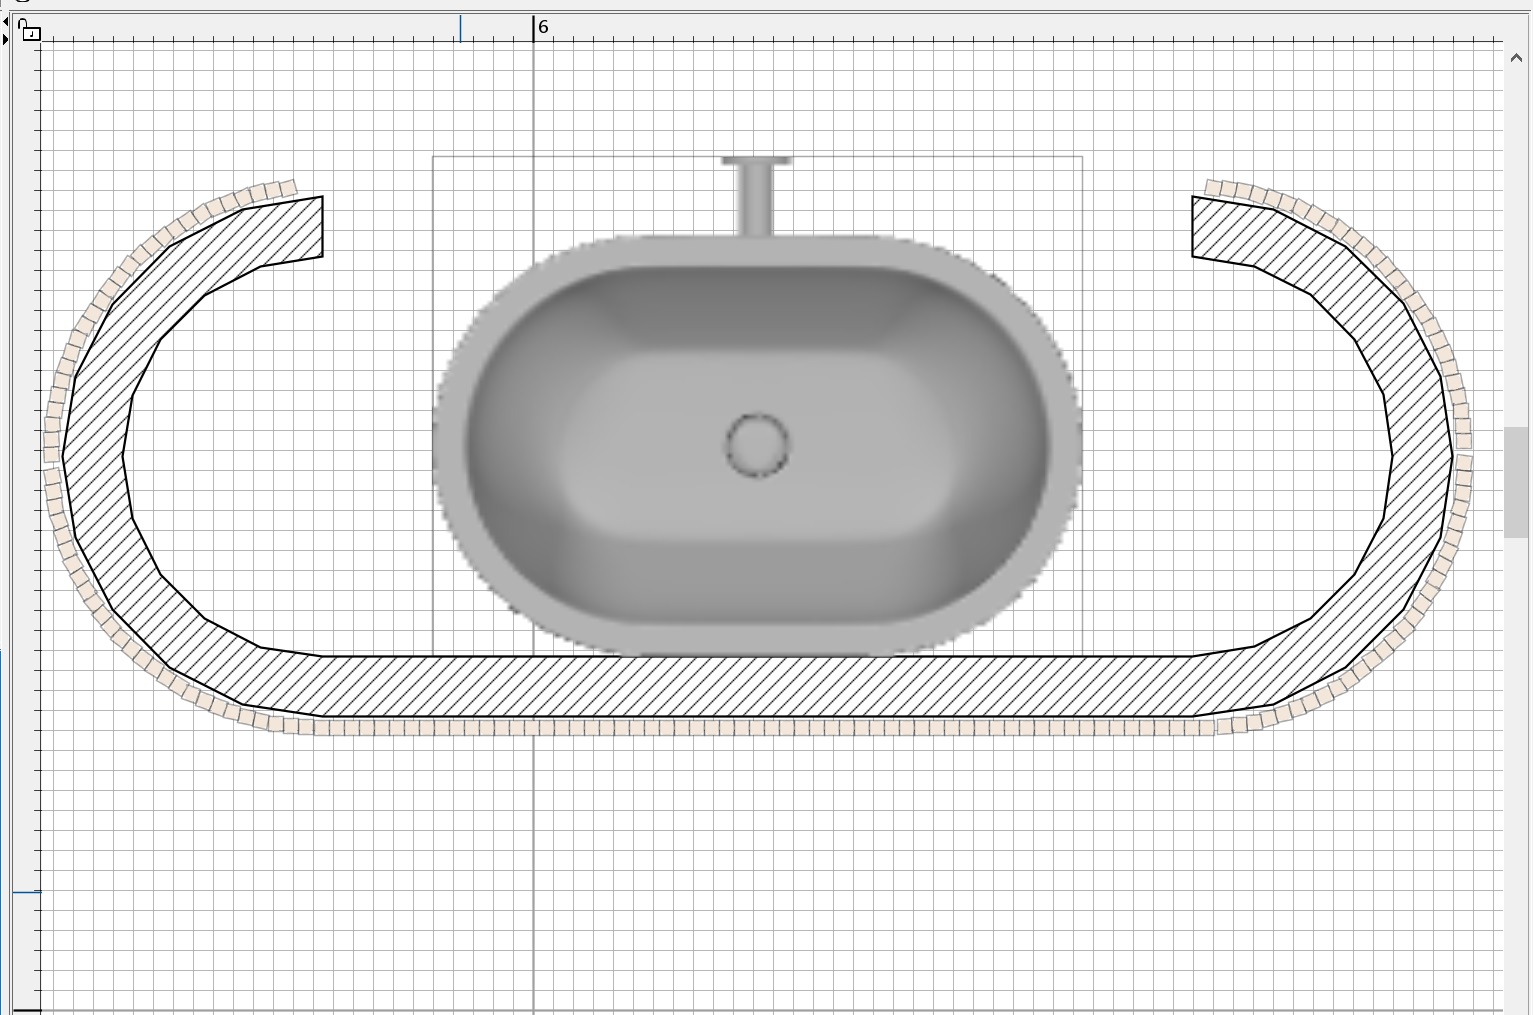
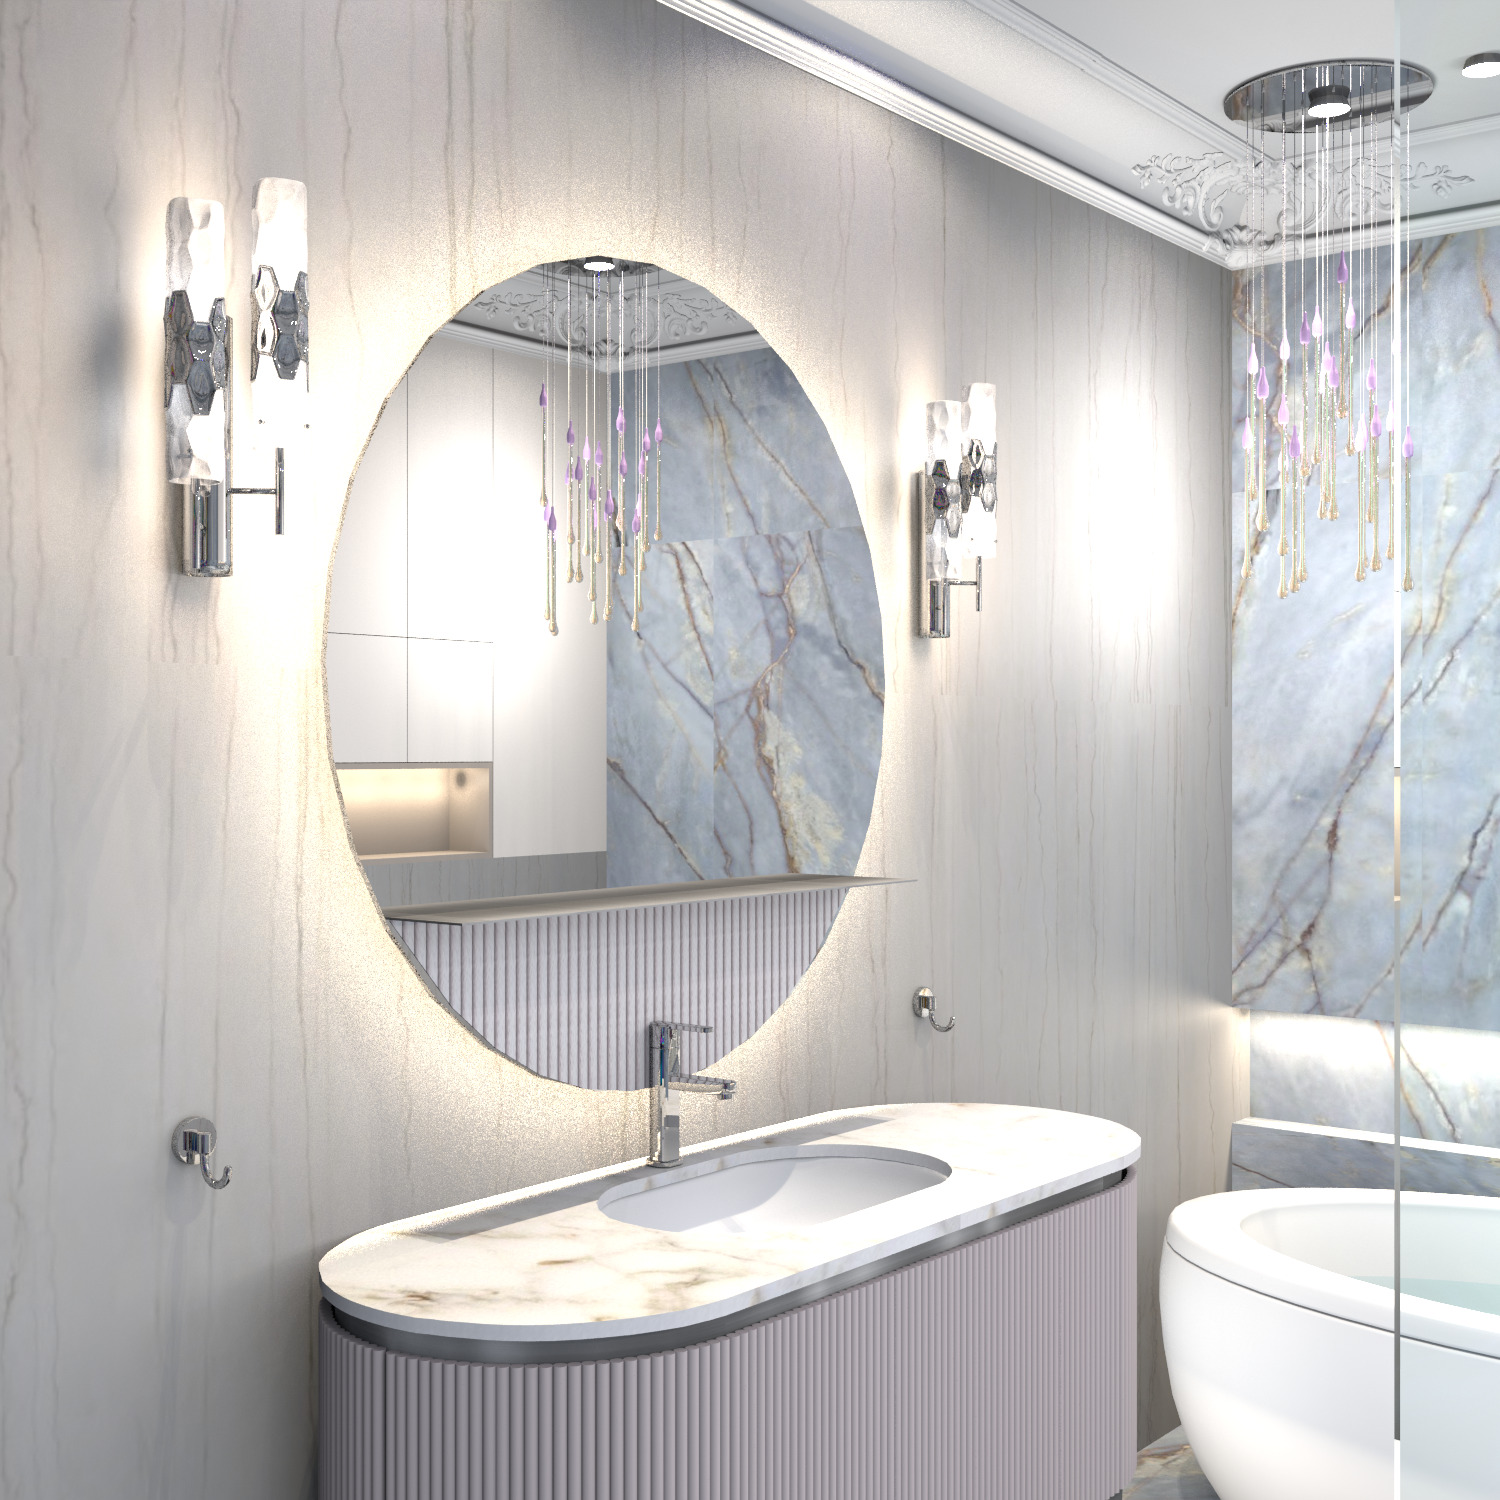
the dimensions of the furniture are 146cm x 56cm, height 55 cm. First, I prepared a composition of walls with smaller dimensions, these will be steel vertical walls of furniture. The facades consist of thin 1.5 cm cylinders that touch each other. It is necessary to turn off the magnet and carefully place these chains of cylinders on the surface of walls 47 cm high. The cylinders are 42cm high, do not forget about the gaps that the doors have. You will get furniture. Assign the same color to the cylinders. For interior walls, the texture. Now you need to place the oval shell model exactly in the center, I found it on the Free website 3d.io
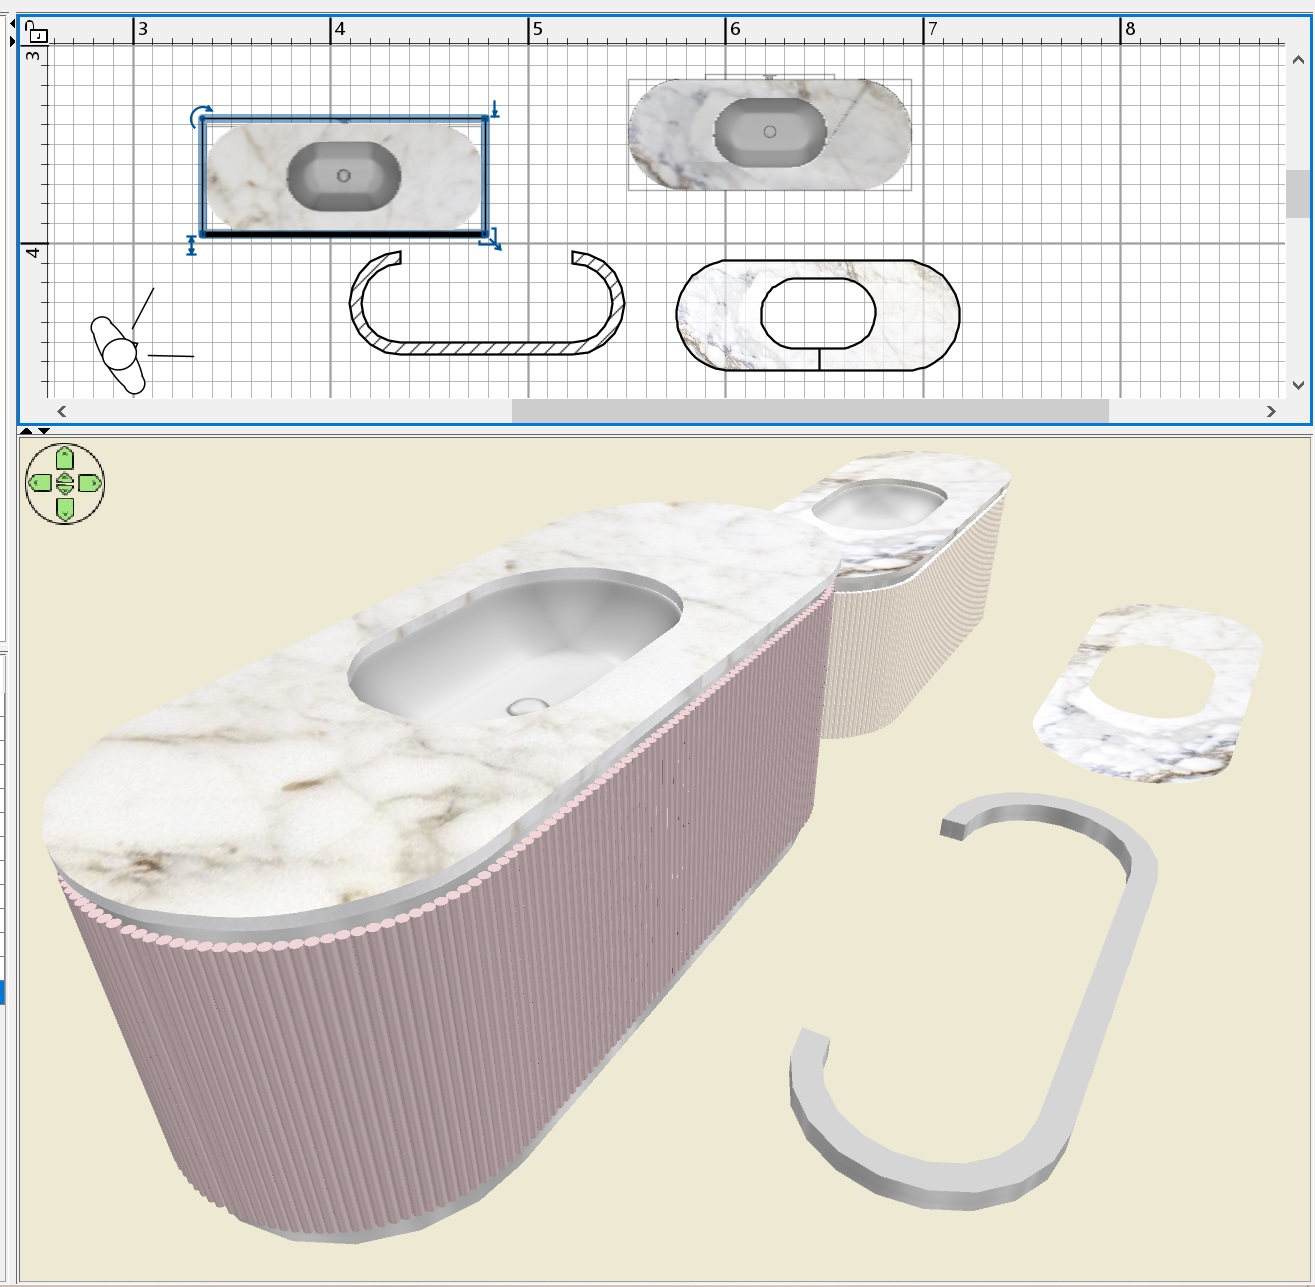
now you need to make a countertop with an oval cutout, exactly repeating the shape of the sink. The advice of the Captaincooc wizard is great for this. You need to create a room right on top of all the objects, be sure to turn off the magnet in curved places. This needs to be done carefully, but if something is crooked, you can fix it later by moving the bad points to the right places. You should get a room like this, assign it a texture, remove the ceiling check box. Copy the room, drag it to the side and turn on the Terrain Generate tool. You need to give some point in the middle a height of 2 cm. You will get a countertop with textures on all surfaces. The generator outputs slightly different heights along the edge, but this can be ignored, it looks fine.
Put it all together and save it in OBJ. From below, then you need to add walls 5 cm high, with the same texture and at the same texture scale as high walls. I have assigned a metal texture, you can make pure chrome, now I will tell you everything about chrome.
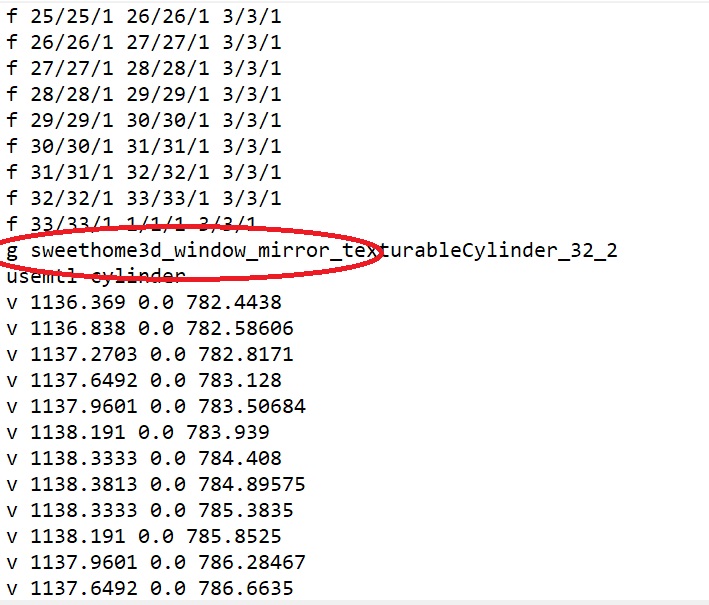
You can use any models (almost all!!!) that are not loaded in the usual way in SH3D. I take this model and unpack it. It is necessary to find a suitable file inside that the program can open. If there is such a file, fine. You need to save the gray model in OBJ. If there are no such files, but you need to try to convert, for example, the FBX format to OBJ, converters often refuse and act up, but there are some who do it. After saving, you need to make a magic transformation of ALL G groups into mirrored ones, you need to add the prefix sweethome3d_window_mirror_
in this huge array of strings, the necessary string of group G is always between F and V, you need to fix everything, it takes time. Save this text file and import the OBJ model again with the necessary changes. If you can figure out which group is not chrome, but for example rubber, fine, you need to skip it and not fix it with a mirror prefix. But if you make all the groups mirrored, it's also good. It is necessary to assign an average gray color in the final model. You'll get great chrome on the render. If you need gold, you need a yellow-brown color. Polished metal is obtained even at the third level of rendering quality. But chrome is best obtained at the maximum fourth level, there is no noise at all. The final render at the fourth quality level is like this. The fourth level slightly darkens the whole picture and there are no reflections in glossy surfaces, but chrome chrome turns out best. This picture was loaded for 14 hours (1500x1500), level 4. At the third level, you need to set a resolution higher (3000x3000) in order to remove noise in chrome as much as possible.
Netherlands
Joined: Apr 8, 2022
Post Count: 1502
Status:
Offline
Re: Apartment project with lighting by invisible hemispheres. I continue advertising
There is an easy trick to merge multiple g groups into a single g group using Blender:
method 1 when you want to merge ALL g groups in an obj file into a single group: Import the obj in Blender as 'object' and with 'groups' turned off. This will import the object as a single object. Export to obj as an object, not groups. Import/Export in Sweet Home 3D and you get an object file with a single g group.
method 2 when you have multiple groups in a model you want to merge: Import the object in Blender as groups. Select the groups you want to merge and choose the join function to merge them into a single group. With this method you can merge multiple groups into one or more merged groups in one go. Export to obj as groups.
Merged groups have several advantages. It is easier to add strings like window_mirror because you only have to add it to a single group. Maybe even more important is that the object is also much more efficient for display in Sweet Home 3D and photo rendering.
Did you know that you can remove all g lines from an object file and still have a valid object? Try it with a box. Export it and remove all g lines except maybe the first one although it is not necessary. You can also change that single g line into a o line. Name that one 'box'. Also remove all usemtl lines except the first one which you can rename to 'Box'. Import in Sweet Home 3D and you get a box with a single material 'Box'. If you leave all usemtl lines Sweet Home 3D will recreate the g groups if you export it because Sweet Home 3D creates a group for each material.
You don't need the terrain generator to get a room with a thickness > 0. Just make sure you have the room on a second level. It will export with the floor thickness as set on the level but of course you can change that thickness after you imported the model.
But mentioning the terrain editor and then seeing the sink made me realize that you could easily create a sink with the terrain editor! Draw a room with the outside border of the sink. With the terrain editor lift everything to the the depth of the sink you want. Then lower from the center to get a bowl form. You can then export/import as staircase and use it to create a hole in the room you use for the cabinet top. Import again but now not as staircase and insert it into the top with the hole.
You can use the multiplier plugin for positioning the cylinders. It can multiply objects in a curve. You just have to figure out the correct numbers but the result is perfectly placed cylinders.
Never mind al the above, you created some beautiful models!
---------------------------------------- Dodecagon.nl 1300+ 3D models, manuals, and projects
Russia
Joined: Aug 13, 2022
Post Count: 623
Status:
Offline
Re: Apartment project with lighting by invisible hemispheres. I continue advertising
Thanks Keet. Your advice is great as always. I knew that the countertop should be made from the room in another correct way, but I did not come up with how))). Therefore, I adapted the landscape generator)). Now I can probably do it without him. I also probably figured out how to make the lower curved part on the mirror, with a decor of cylinders. I'll show you later.
Russia
Joined: Aug 13, 2022
Post Count: 623
Status:
Offline
Re: Apartment project with lighting by invisible hemispheres. I continue advertising
I've been wanting to ask for a long time. And what other important prefixes can be used in the OBJ file? The mirror prefix is very important. But what else can be used?
Russia
Joined: Aug 13, 2022
Post Count: 623
Status:
Offline
Re: Apartment project with lighting by invisible hemispheres. I continue advertising
Thanks Keet! It takes a long time to study and experiment, I will definitely do it. While I don't see what can be applied with effect from these prefixes, I need to try and combine them with different rendering modes. I made a relief insert on a semicircular part under the shelf on the mirror. There are two ways. This part is made of several walls of the same color and parameters, in the model after exporting to OBJ it is one group. Method 1 - you need to make a viral visit and set the viewer's head tilt to 0, go down to the bedside table. Make a printscreen. And in the JPG image, cut out only ONE fragment of the cylinder. Why only one? Because when assigning a texture to this group, this fragment will be replicated and all cylinders will be the same. The scale of the texture in the model turned out to be 10%, it looks like the decor of the facades of the cabinets next to it. There are differences in color in the final render. The detail on the mirror and on the bedside table is of different shades. But this must also be taken into account to prepare a lighter color option for the printscreen, raise the color selection cursor strictly vertically up by 50% (HSV). Without this adjustment, I got this kind of render, there is a difference in color. But this method is good because it does not need to be adjusted in other photo editing programs - everything turns out to be done in SH3D.
the second method is more interesting. You also need to adjust the viewer with a head tilt of 0, but light up the relief a little from the side, make a render, convert to JPG format. And again, select only one cylinder, immediately select the lightest area of all the cylinders (on my right, closer to the light source). Now the texture on the render will have a very similar color of all the furniture. If there are lamps of different colors in the main stage, then two lamps can be used - white and yellow. It will turn out quite correctly. I didn't do that - as a result, there is a slight cold shade. But it can be fixed in advance, now I understand how.
We already know what the sweethome3d_window_mirror does, it creates a mirror effect when you render a photo. We can also use it to simulate a chrome texture.
The sweethome3d_window_pane changes the material defined for the group into a window. It adds a "d 0.5" value to the materials of the groups with that prefix. In other words, it sets a 50% transparency. We can just add the d value in the mtl file and have more control over the percentage value.
A noticeable difference: There are extended prefixes for a mirror or pane on a hinge or rail (sweethome3d_window_mirror_on_hinge_, sweethome3d_window_mirror_on_rail_, sweethome3d_window_pane_on_hinge_, and sweethome3d_window_pane_on_rail_) but NOT for a mirror or pane on a ball.
I don't know what the edge_color and sweethome3d_light prefixes do. The edge_color might be an internal constant. The sweethome3d_light prefix doesn't change the object into a light, at least not with a power setting and not as a light source. Maybe Emmanuel can explain these.
---------------------------------------- Dodecagon.nl 1300+ 3D models, manuals, and projects
Russia
Joined: Aug 13, 2022
Post Count: 623
Status:
Offline
Re: Apartment project with lighting by invisible hemispheres. I continue advertising
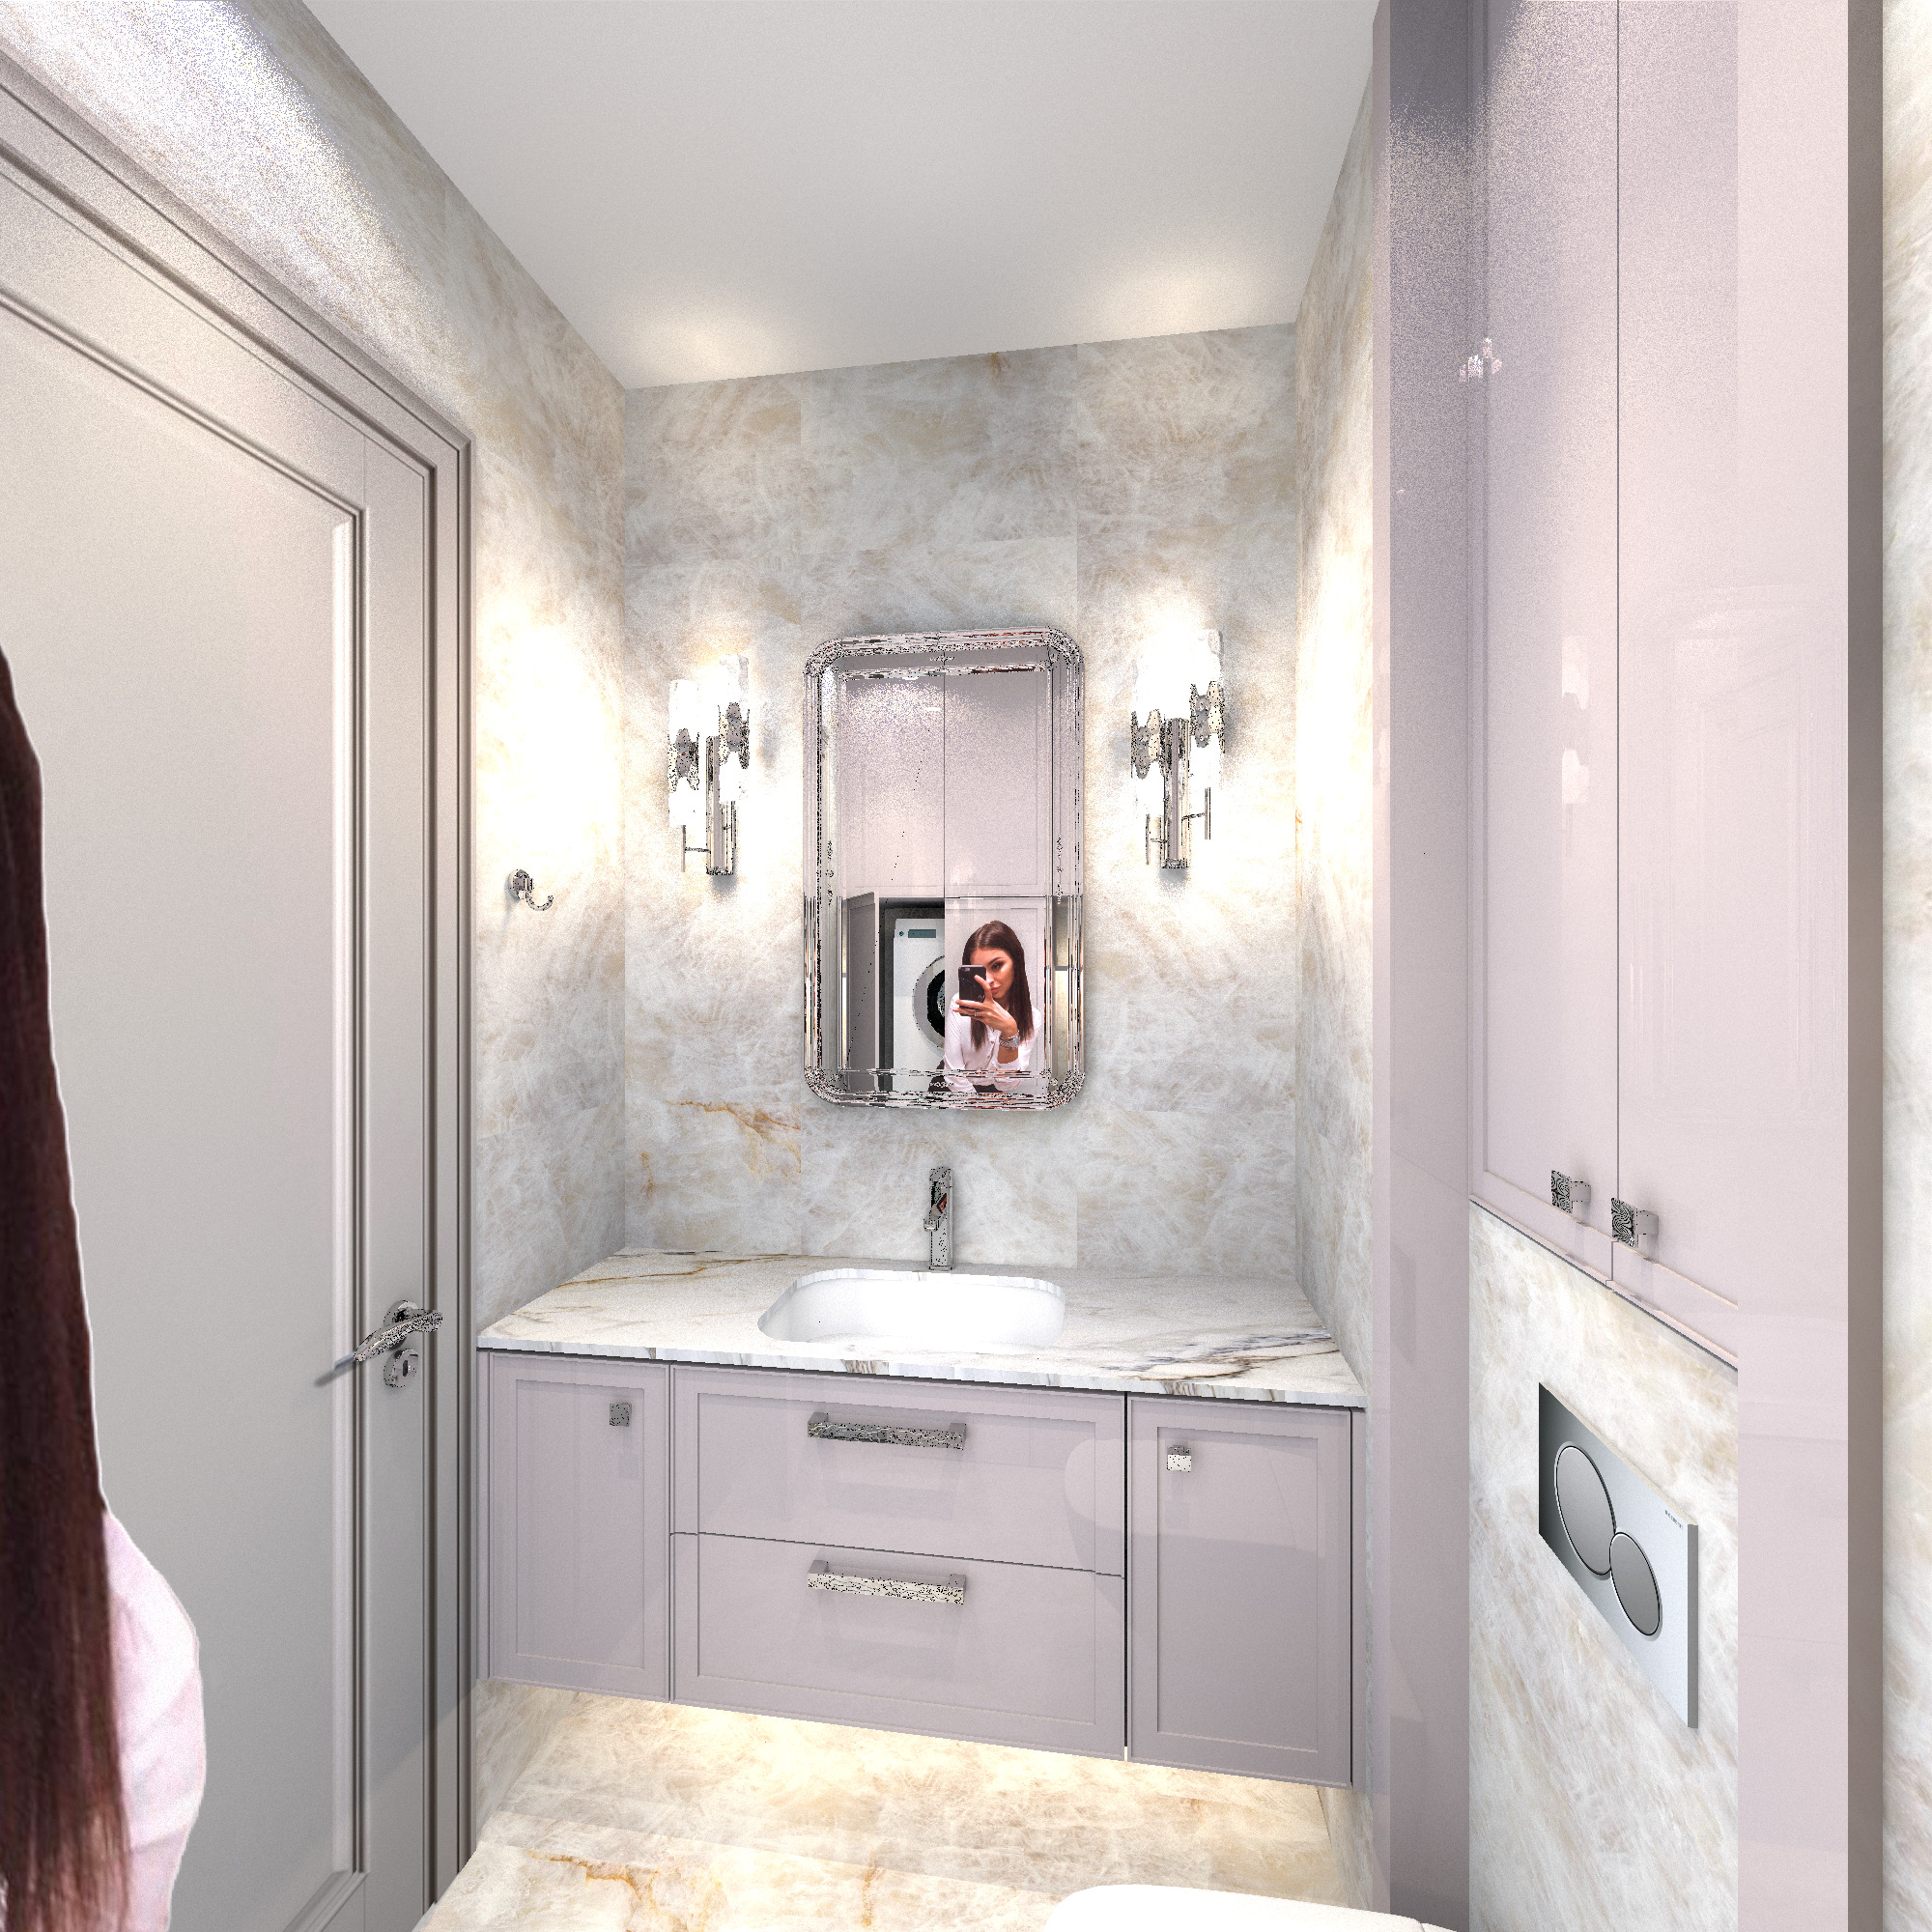
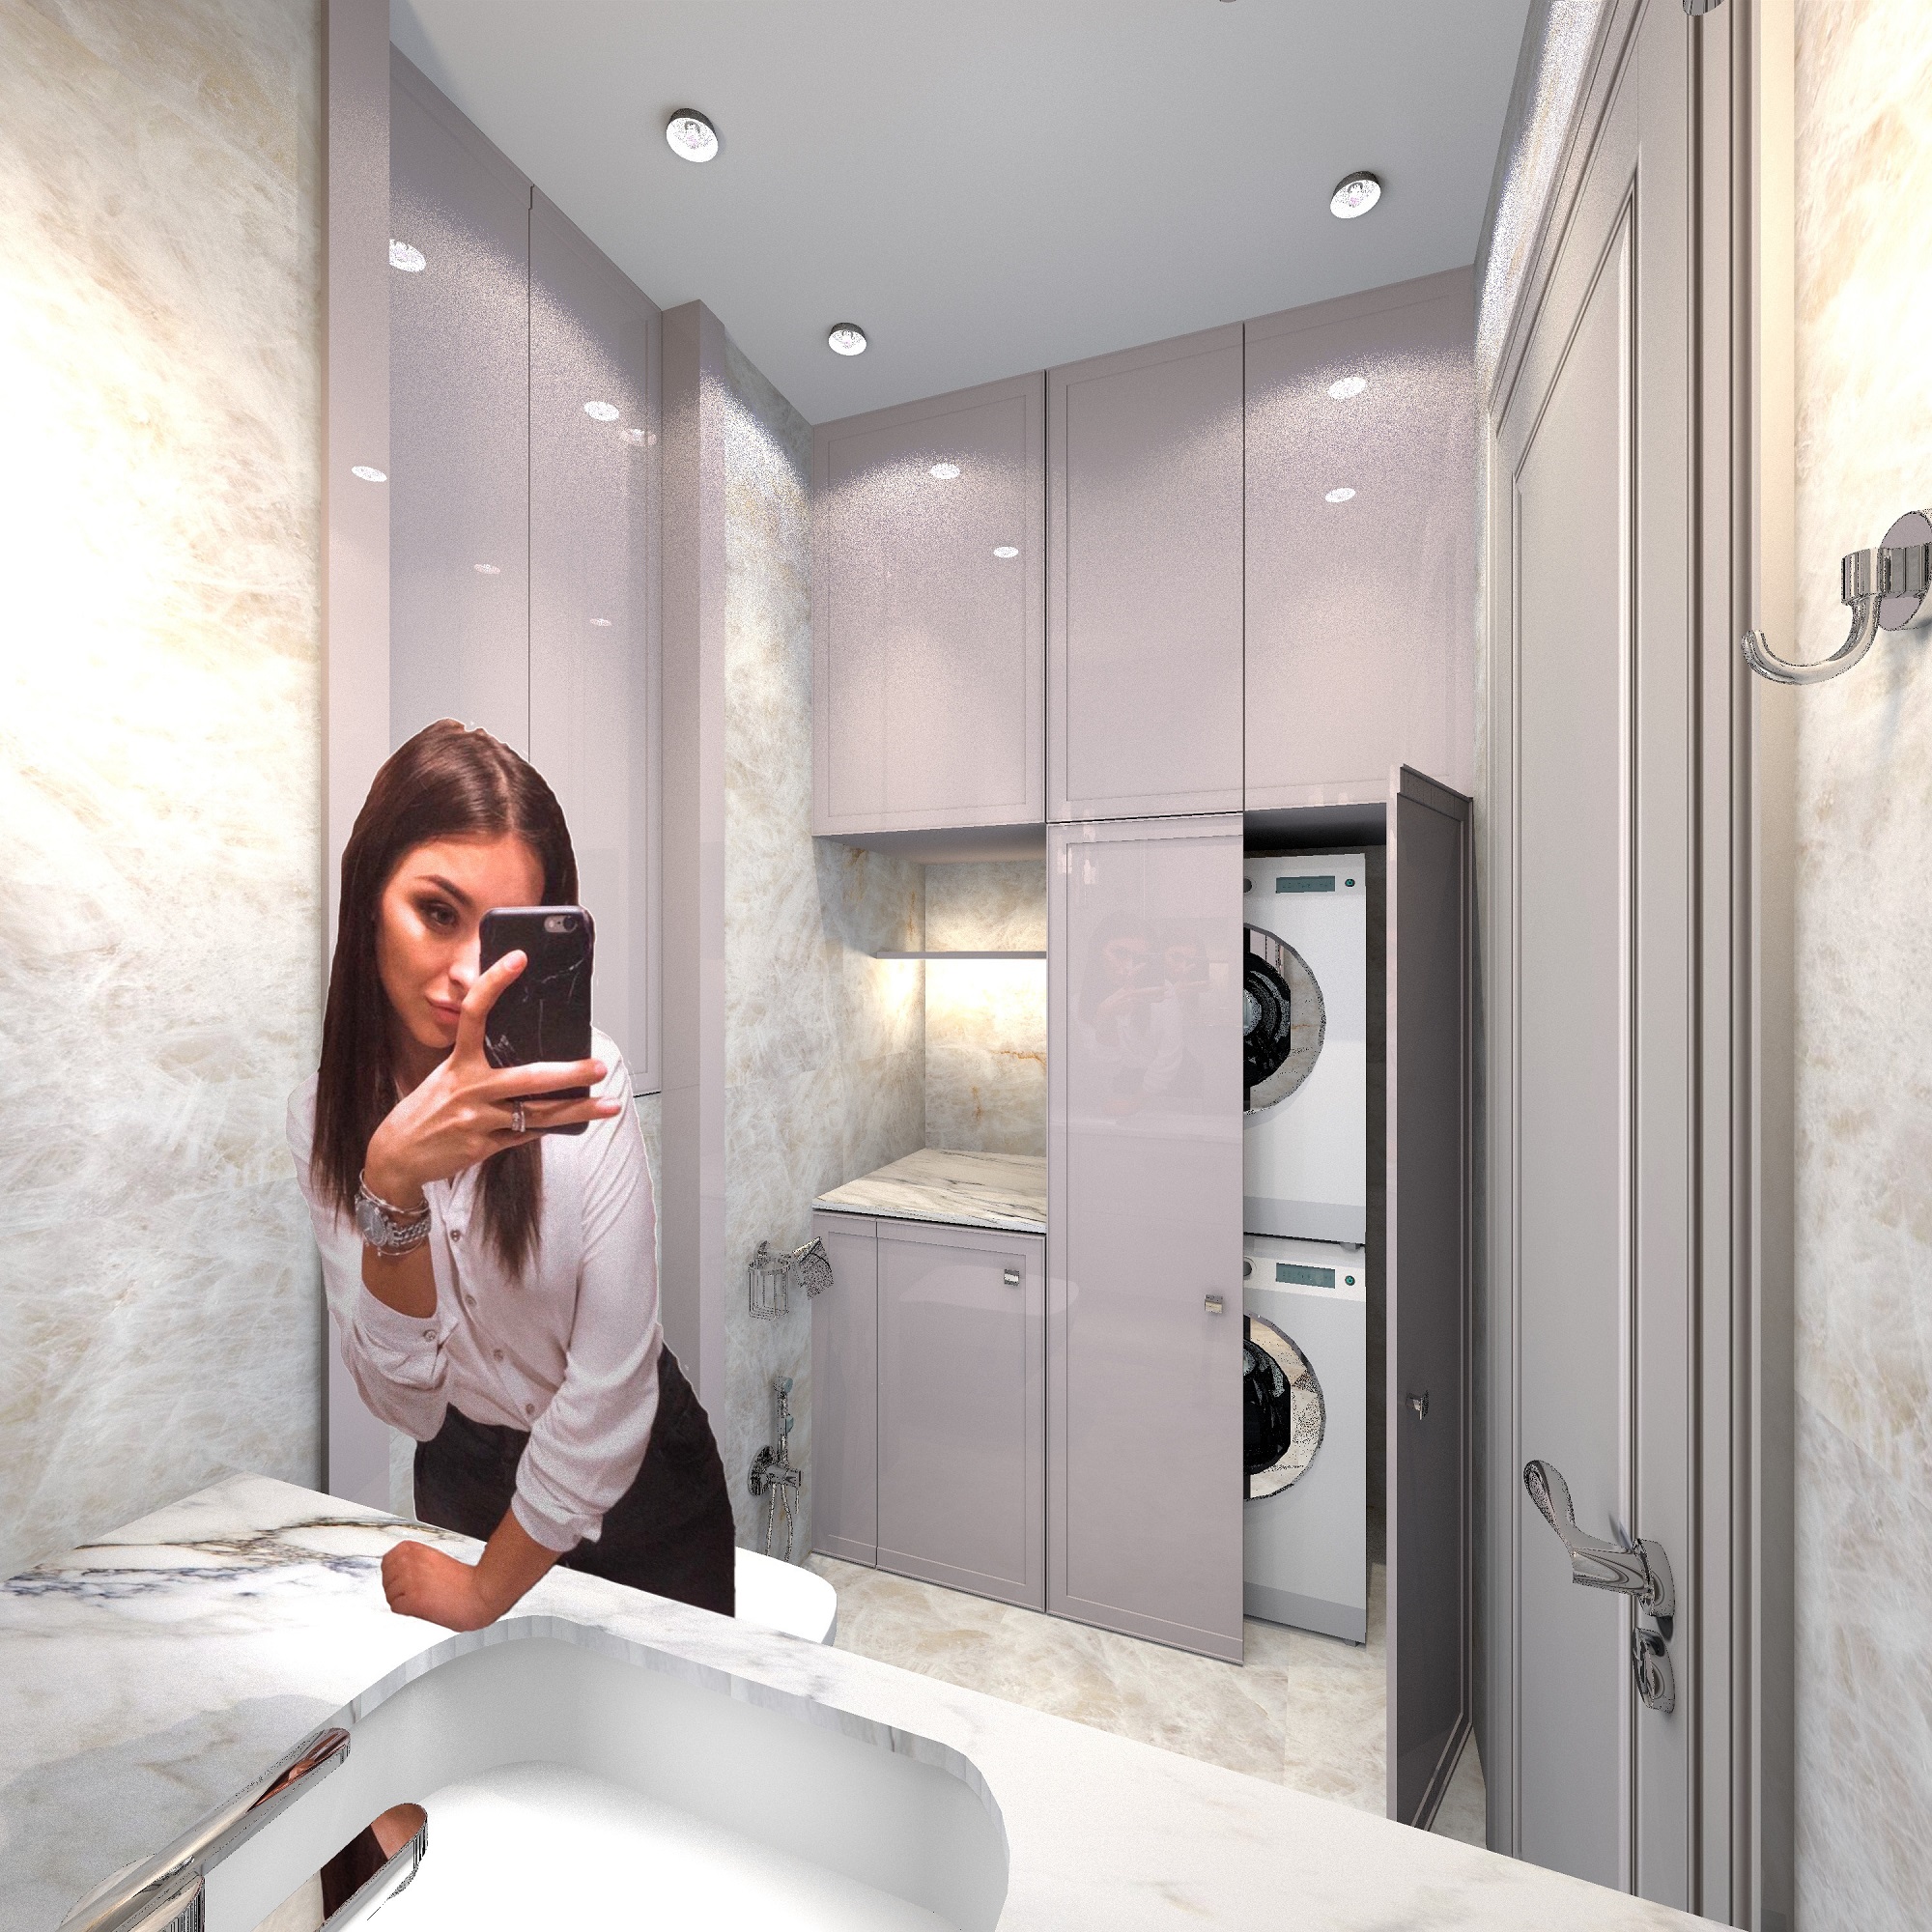
Selfie in the laundry room)) The main task is to ensure that the model does not interfere with the interior. The interior is the main one.))) I learned how to highlight the texture on the box correctly! It should not be illuminated from the front, as usual for opaque textures, but only from the end, putting a flattened hemisphere on the edge. Then a bright glow begins
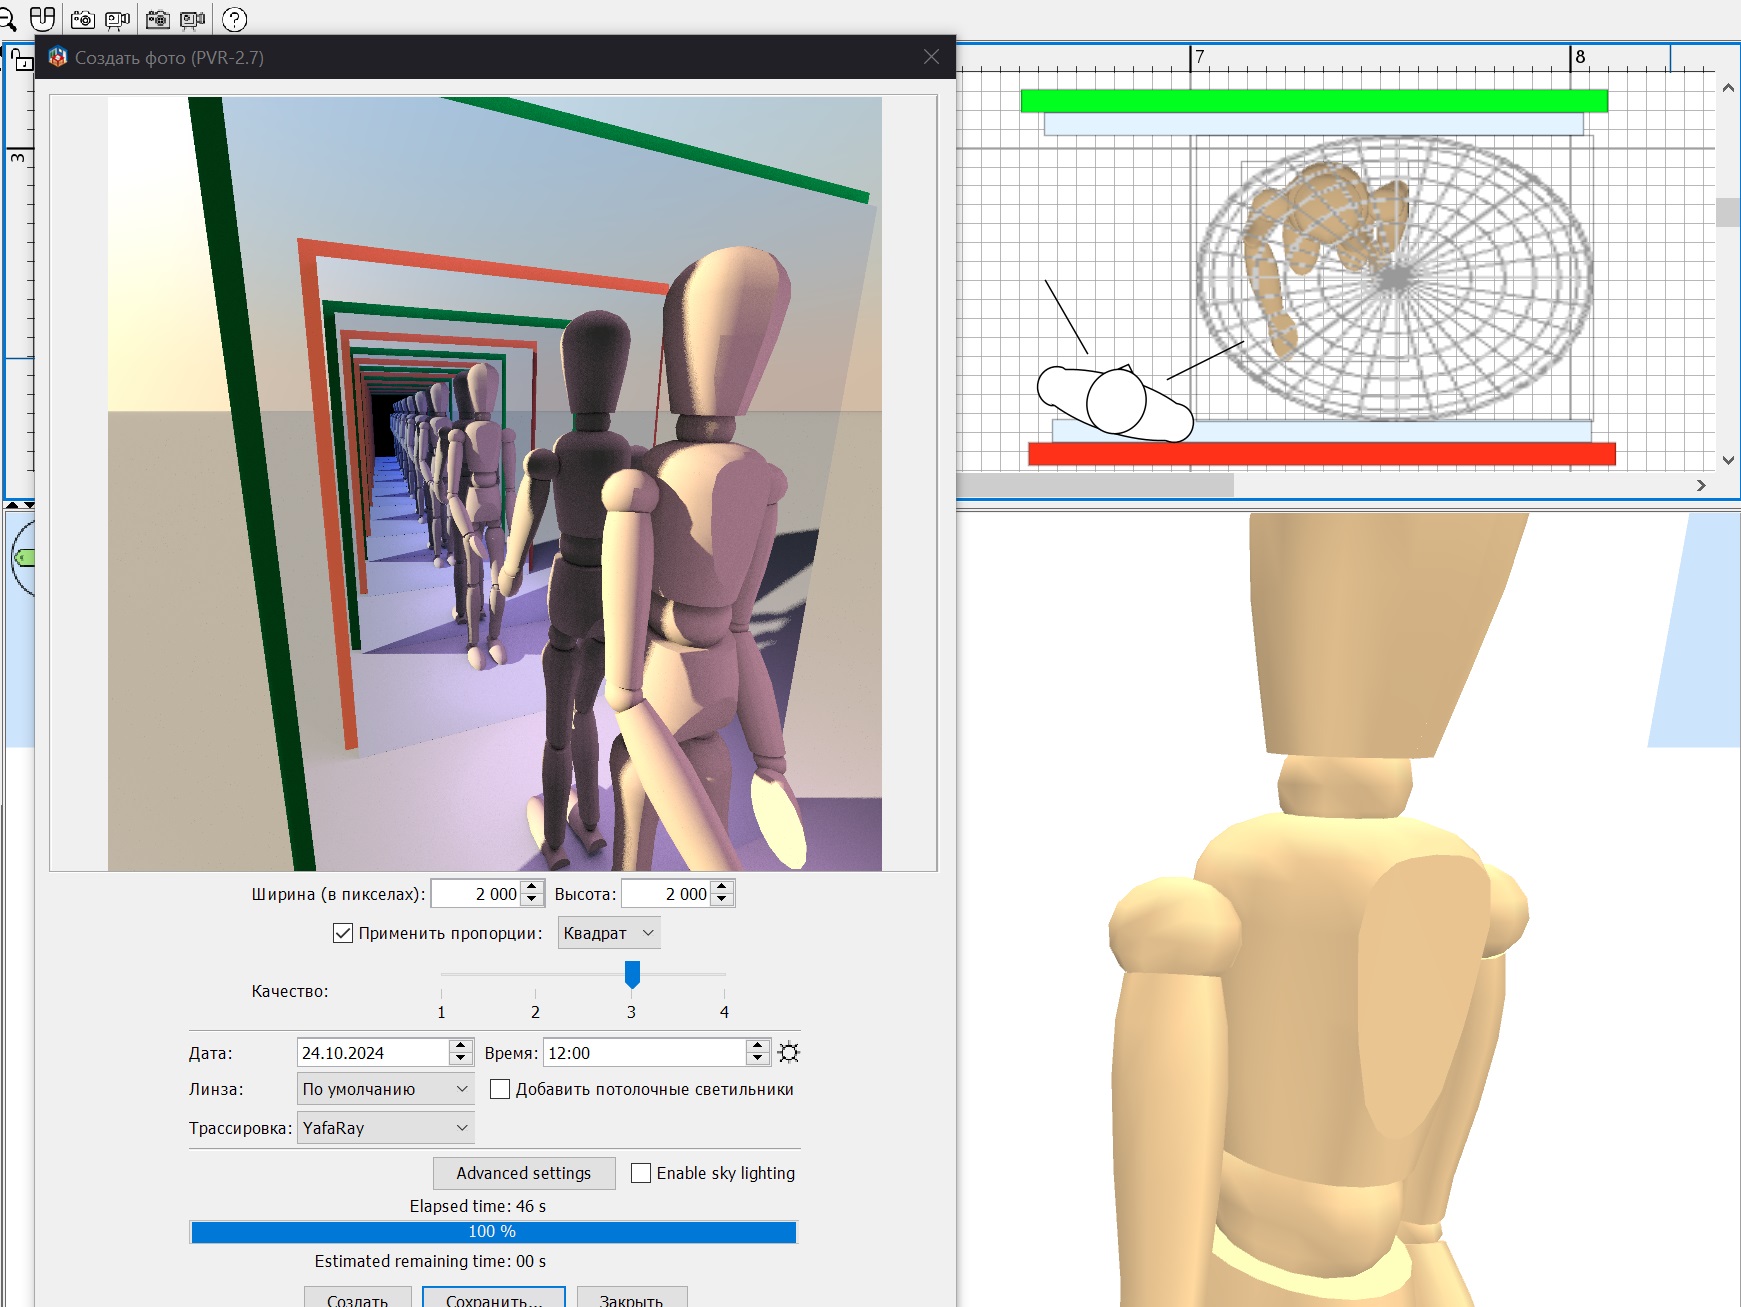
please note that the reflection of the girl in the lacquer door is double - a reflection from the mirror in front of her, the second reflection in the glossy lacquer of the door behind. Unfortunately, this is not true, the varnish should have a larger reflection from the back first. But I don't have such an image, and the PNG texture on the box looks the same on both sides. Therefore, it will not be true. It is not so noticeable in the varnish, but if there are two mirrors, then the lie is immediately visible. And I found out earlier that the endless corridor of reflections in the program is limited to repetitions, after the sixth there will be a black square. This is done specifically so as not to overshadow the processor's work during processing. It is not very critical for glossy varnish, only for two mirrors.
France
Joined: Oct 20, 2017
Post Count: 345
Status:
Offline
Re: Apartment project with lighting by invisible hemispheres. I continue advertising
Je reste toujours extrêmement impressionné par l'originalité et la qualité de vos réalisations et des images obtenues. On dirait de vraies photos. Encore bravo à vous, GaudiGalopin.
Seul regret sur les images avec la jeune fille. On ne voit pas ce qu'elle regarde sur son téléphone