Netherlands
Joined: Apr 8, 2022
Post Count: 1502
Status:
Offline
Re: Countertop Cutouts
The easiest way is to use a wall for your countertop.
First tilt your sink so the top points forward. Export the sink. Import the sink and check "Door or window" in the import dialog.
Create a wall as if you have your counter top standing on its front side. Insert your import "window-sink" in the wall and adjust its position and elevation. It will create a hole in the wall the size of your sink.
Only select the wall and export it as countertop.obj. Import it and tilt it back so it is horizontal again. Export/import and you have your countertop with a hole for your sink.
A little tip: If your sink has a small border you should make the sink a little smaller before export and import as a window. This will make the hole a little smaller so it stays under the border of your original sink.
Check the manuals page on dodecagon.nl for a manual on how to change material names. A material "Top" looks better than "wall_1_1" if you want to set the color or texture of your countertop.
---------------------------------------- Dodecagon.nl 1300+ 3D models, manuals, and projects
France
Joined: Oct 20, 2017
Post Count: 345
Status:
Offline
Re: Countertop Cutouts
Bonjour Forester,
La méthode proposée par Keet est en effet très bien. Personnellement, je procède de façon différente.
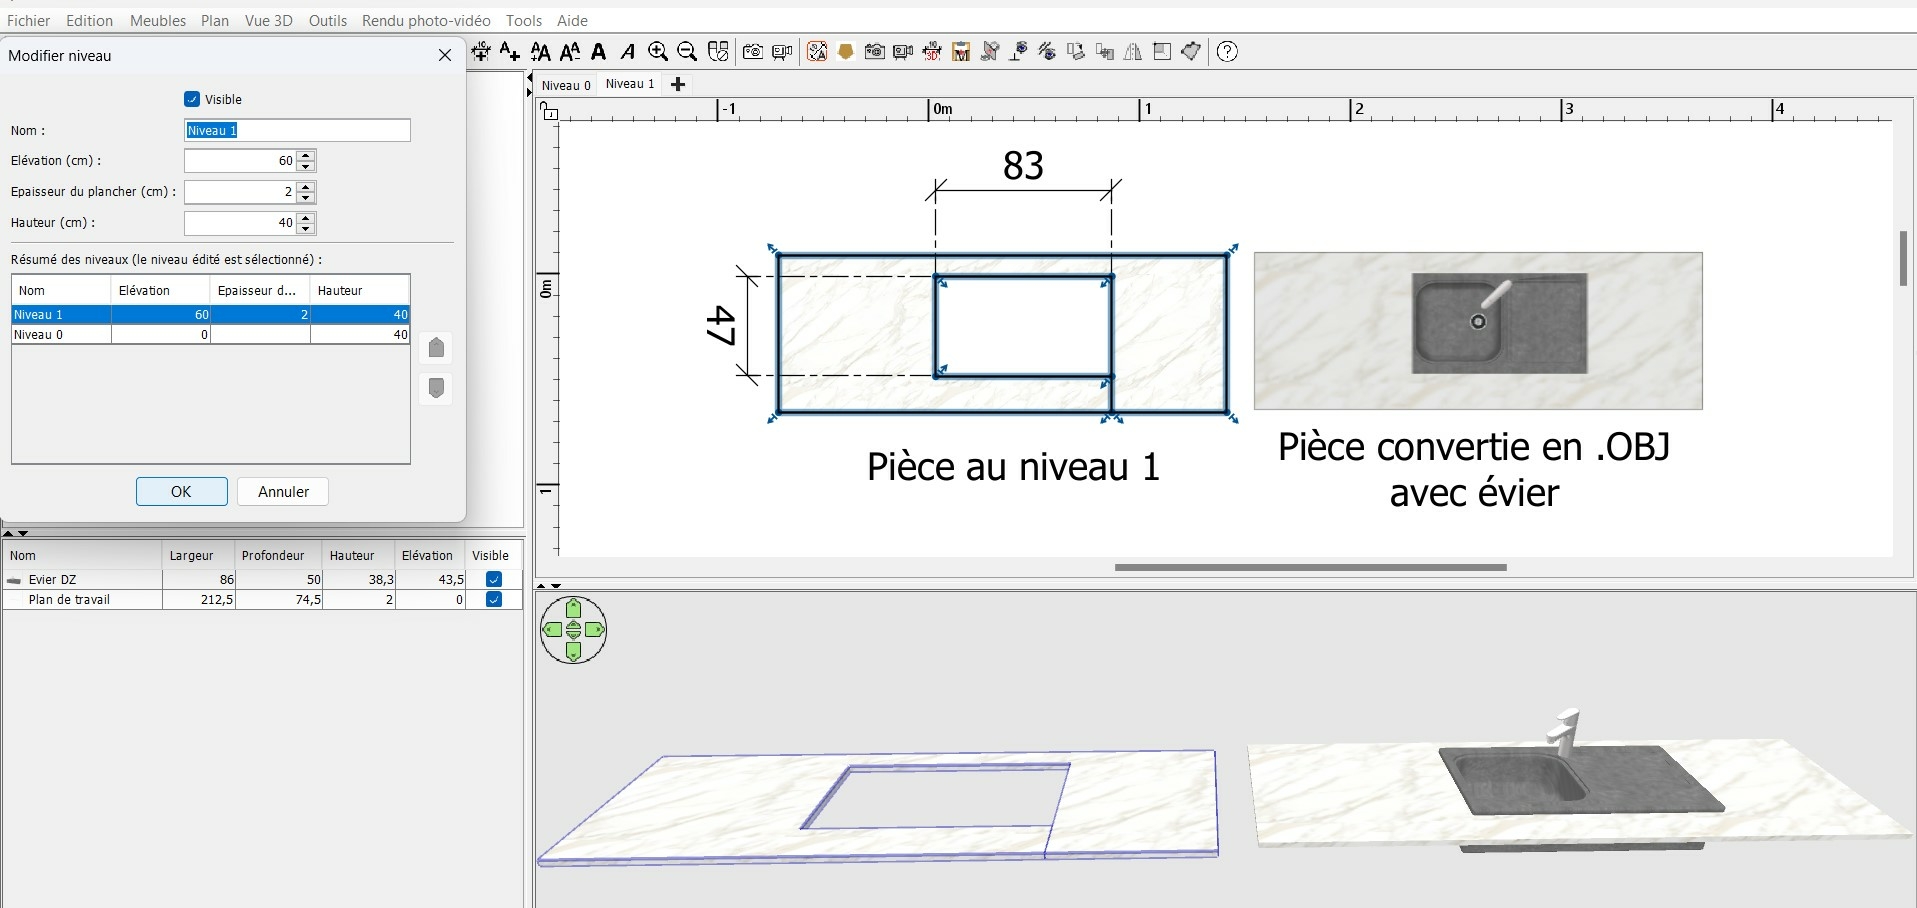
En le faisant au niveau 1 (pour pouvoir définir l'épaisseur désirée), je dessine une pièce représentant mon plan de travail avec dedans une partie non remplie aux dimensions légèrement inférieures à celles de l'évier. Puis j'exporte cette pièce au format .obj.
Une fois ré importée en tant que meuble, ne reste plus qu'à mettre l'évier dans le trou et régler les hauteurs.
Netherlands
Joined: Apr 8, 2022
Post Count: 1502
Status:
Offline
Re: Countertop Cutouts
Yes, also an easy method... if you have a sink that fits into a rectangular hole. In that case yet another method would be to use boxes to create the top around the sink. With a round sink or any other form that won't fit into a rectangular hole you will have to use the wall method.
With boxes align them around the sink and export them together. After import use the Texture option, not the material Modify button. This gives an even texture over the whole countertop as if the hole is really cut out.
captaincook always cooks up good alternatives
[for captaincook] Oui, c'est aussi une méthode facile... si vous avez un évier qui s'insère dans un trou rectangulaire. Dans ce cas, une autre méthode consiste à utiliser des boîtes pour créer le dessus autour de l'évier. Avec un évier rond ou toute autre forme qui ne s'insère pas dans un trou rectangulaire, vous devrez utiliser la méthode murale.
Les boîtes sont alignées autour de l'évier et exportées ensemble. Après l'importation, utilisez l'option Texture, et non le bouton Modifier le matériau. Cela permet d'obtenir une texture uniforme sur l'ensemble du plan de travail, comme si le trou était réellement découpé.
captaincook propose toujours de bonnes alternatives. (ce jeu de mots ne fonctionne qu'en anglais)
---------------------------------------- Dodecagon.nl 1300+ 3D models, manuals, and projects
France
Joined: Oct 20, 2017
Post Count: 345
Status:
Offline
Re: Countertop Cutouts
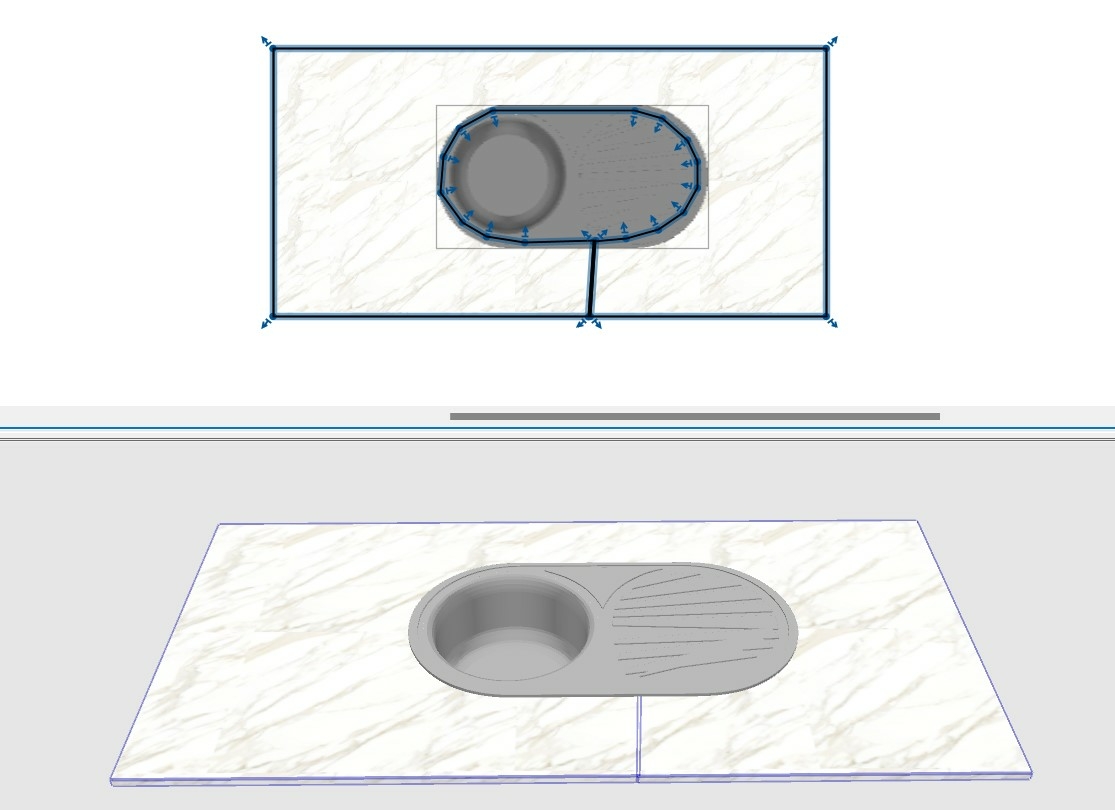
Même avec un évier non carré ou rectangulaire, le principe est le même. Il suffit de tracer les contours de la pièce en suivant les sections arrondies.
Netherlands
Joined: Apr 8, 2022
Post Count: 1502
Status:
Offline
Re: Countertop Cutouts
Même avec un évier non carré ou rectangulaire, le principe est le même. Il suffit de tracer les contours de la pièce en suivant les sections arrondies.
A very important thing to remember when using a room for furniture parts is that you MUST apply a texture on the original room BEFORE exporting because texturing after import of the object will distort the sides with a diagonal texture. You can use a random texture because it is just used to set the texture alignments for export. After import a change of texture will retain the correct alignment. I apply textures to all furniture parts I create, even if I know they will be just a color after assembly. Setting the texture shows me where I have to rotate or shift a texture on a side to make it look nice. That way I can distribute a model with only colors (smaller size) but when a user of the model wants to set a texture it will still look perfect.
(French] Une chose très importante à retenir lorsque vous utilisez une pièce pour des éléments de mobilier est que vous DEVEZ appliquer une texture sur la pièce d'origine AVANT l'exportation, car l'application d'une texture après l'importation de l'objet déformera les côtés avec une texture en diagonale. Vous pouvez utiliser une texture aléatoire, car elle sert uniquement à définir les alignements de texture pour l'exportation. Après l'importation, un changement de texture conservera l'alignement correct. J'applique des textures à toutes les pièces de mobilier que je crée, même si je sais qu'elles ne seront qu'une couleur après l'assemblage. Le paramétrage de la texture me montre où je dois faire pivoter ou décaler une texture sur un côté pour qu'elle ait un bel aspect. De cette façon, je peux distribuer un modèle avec seulement des couleurs (taille réduite), mais lorsqu'un utilisateur du modèle voudra appliquer une texture, il aura toujours l'air parfait.
Traduit avec DeepL.com (version gratuite)
---------------------------------------- Dodecagon.nl 1300+ 3D models, manuals, and projects