Russia
Joined: Aug 13, 2022
Post Count: 617
Status:
Offline
create a room clip using AI. Instruction manual
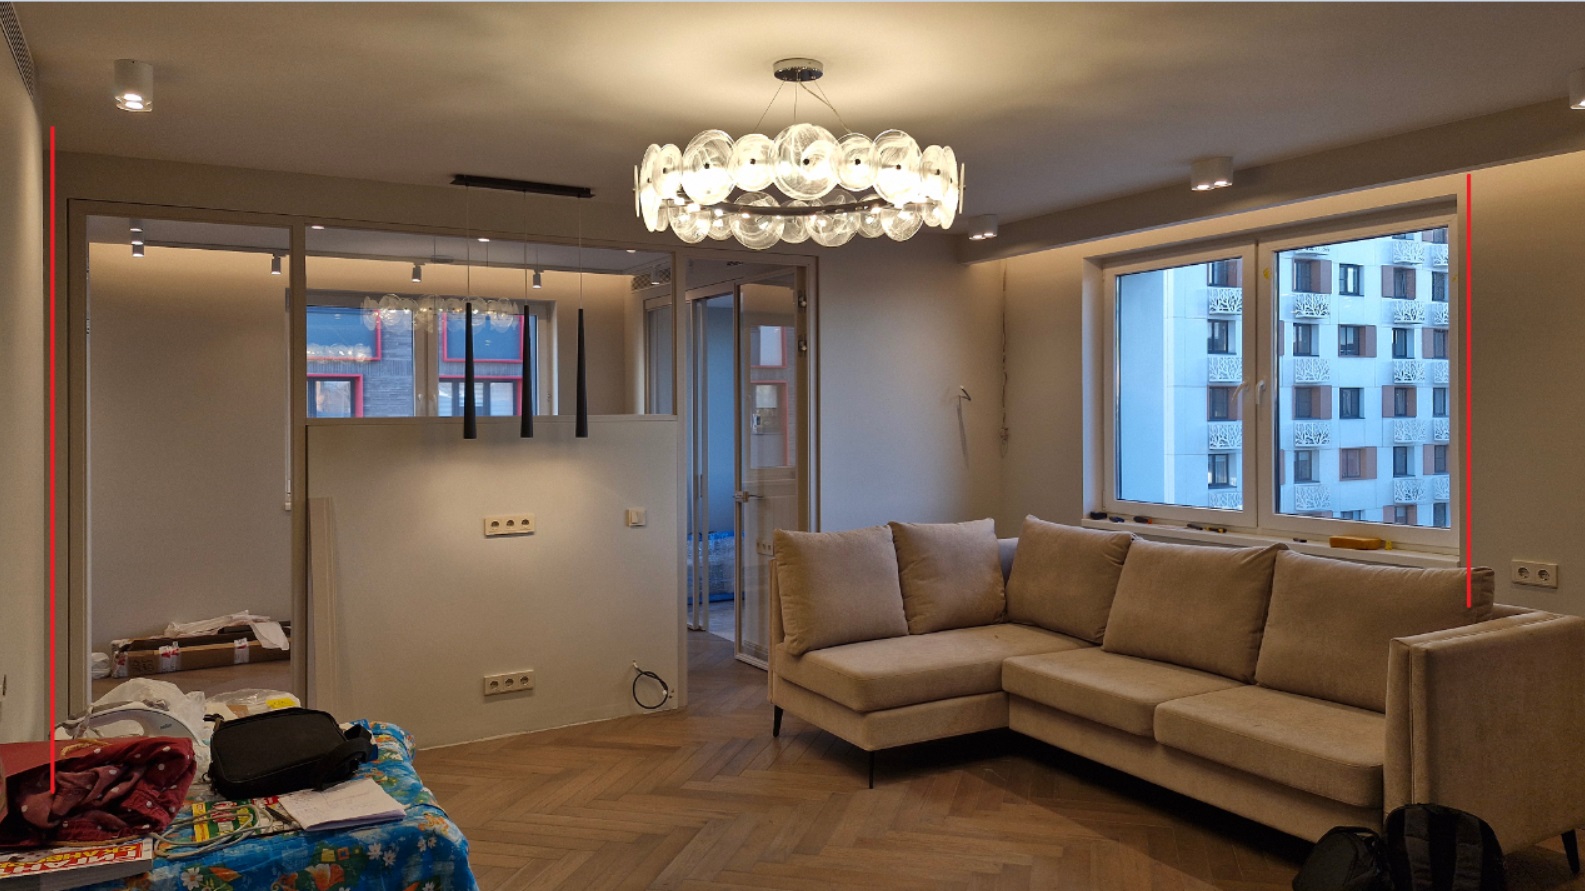
I have already mentioned in the neighboring topics that it is possible to create 3D models of objects using AI based on photography. Trellis handles this task well. You need to get or take a photo of each object from a real room yourself, cut out the background and save it as an initial photo to generate a 3D model. I decided to make a short video with these AI objects from a real room. I'm working on this real room right now. I took the photo as far away as possible to get a wide view using a simple smartphone. In the photo editor, I deformed my photo curve so that all vertical angles were vertical, without distorting the linear perspective. I got this photo.
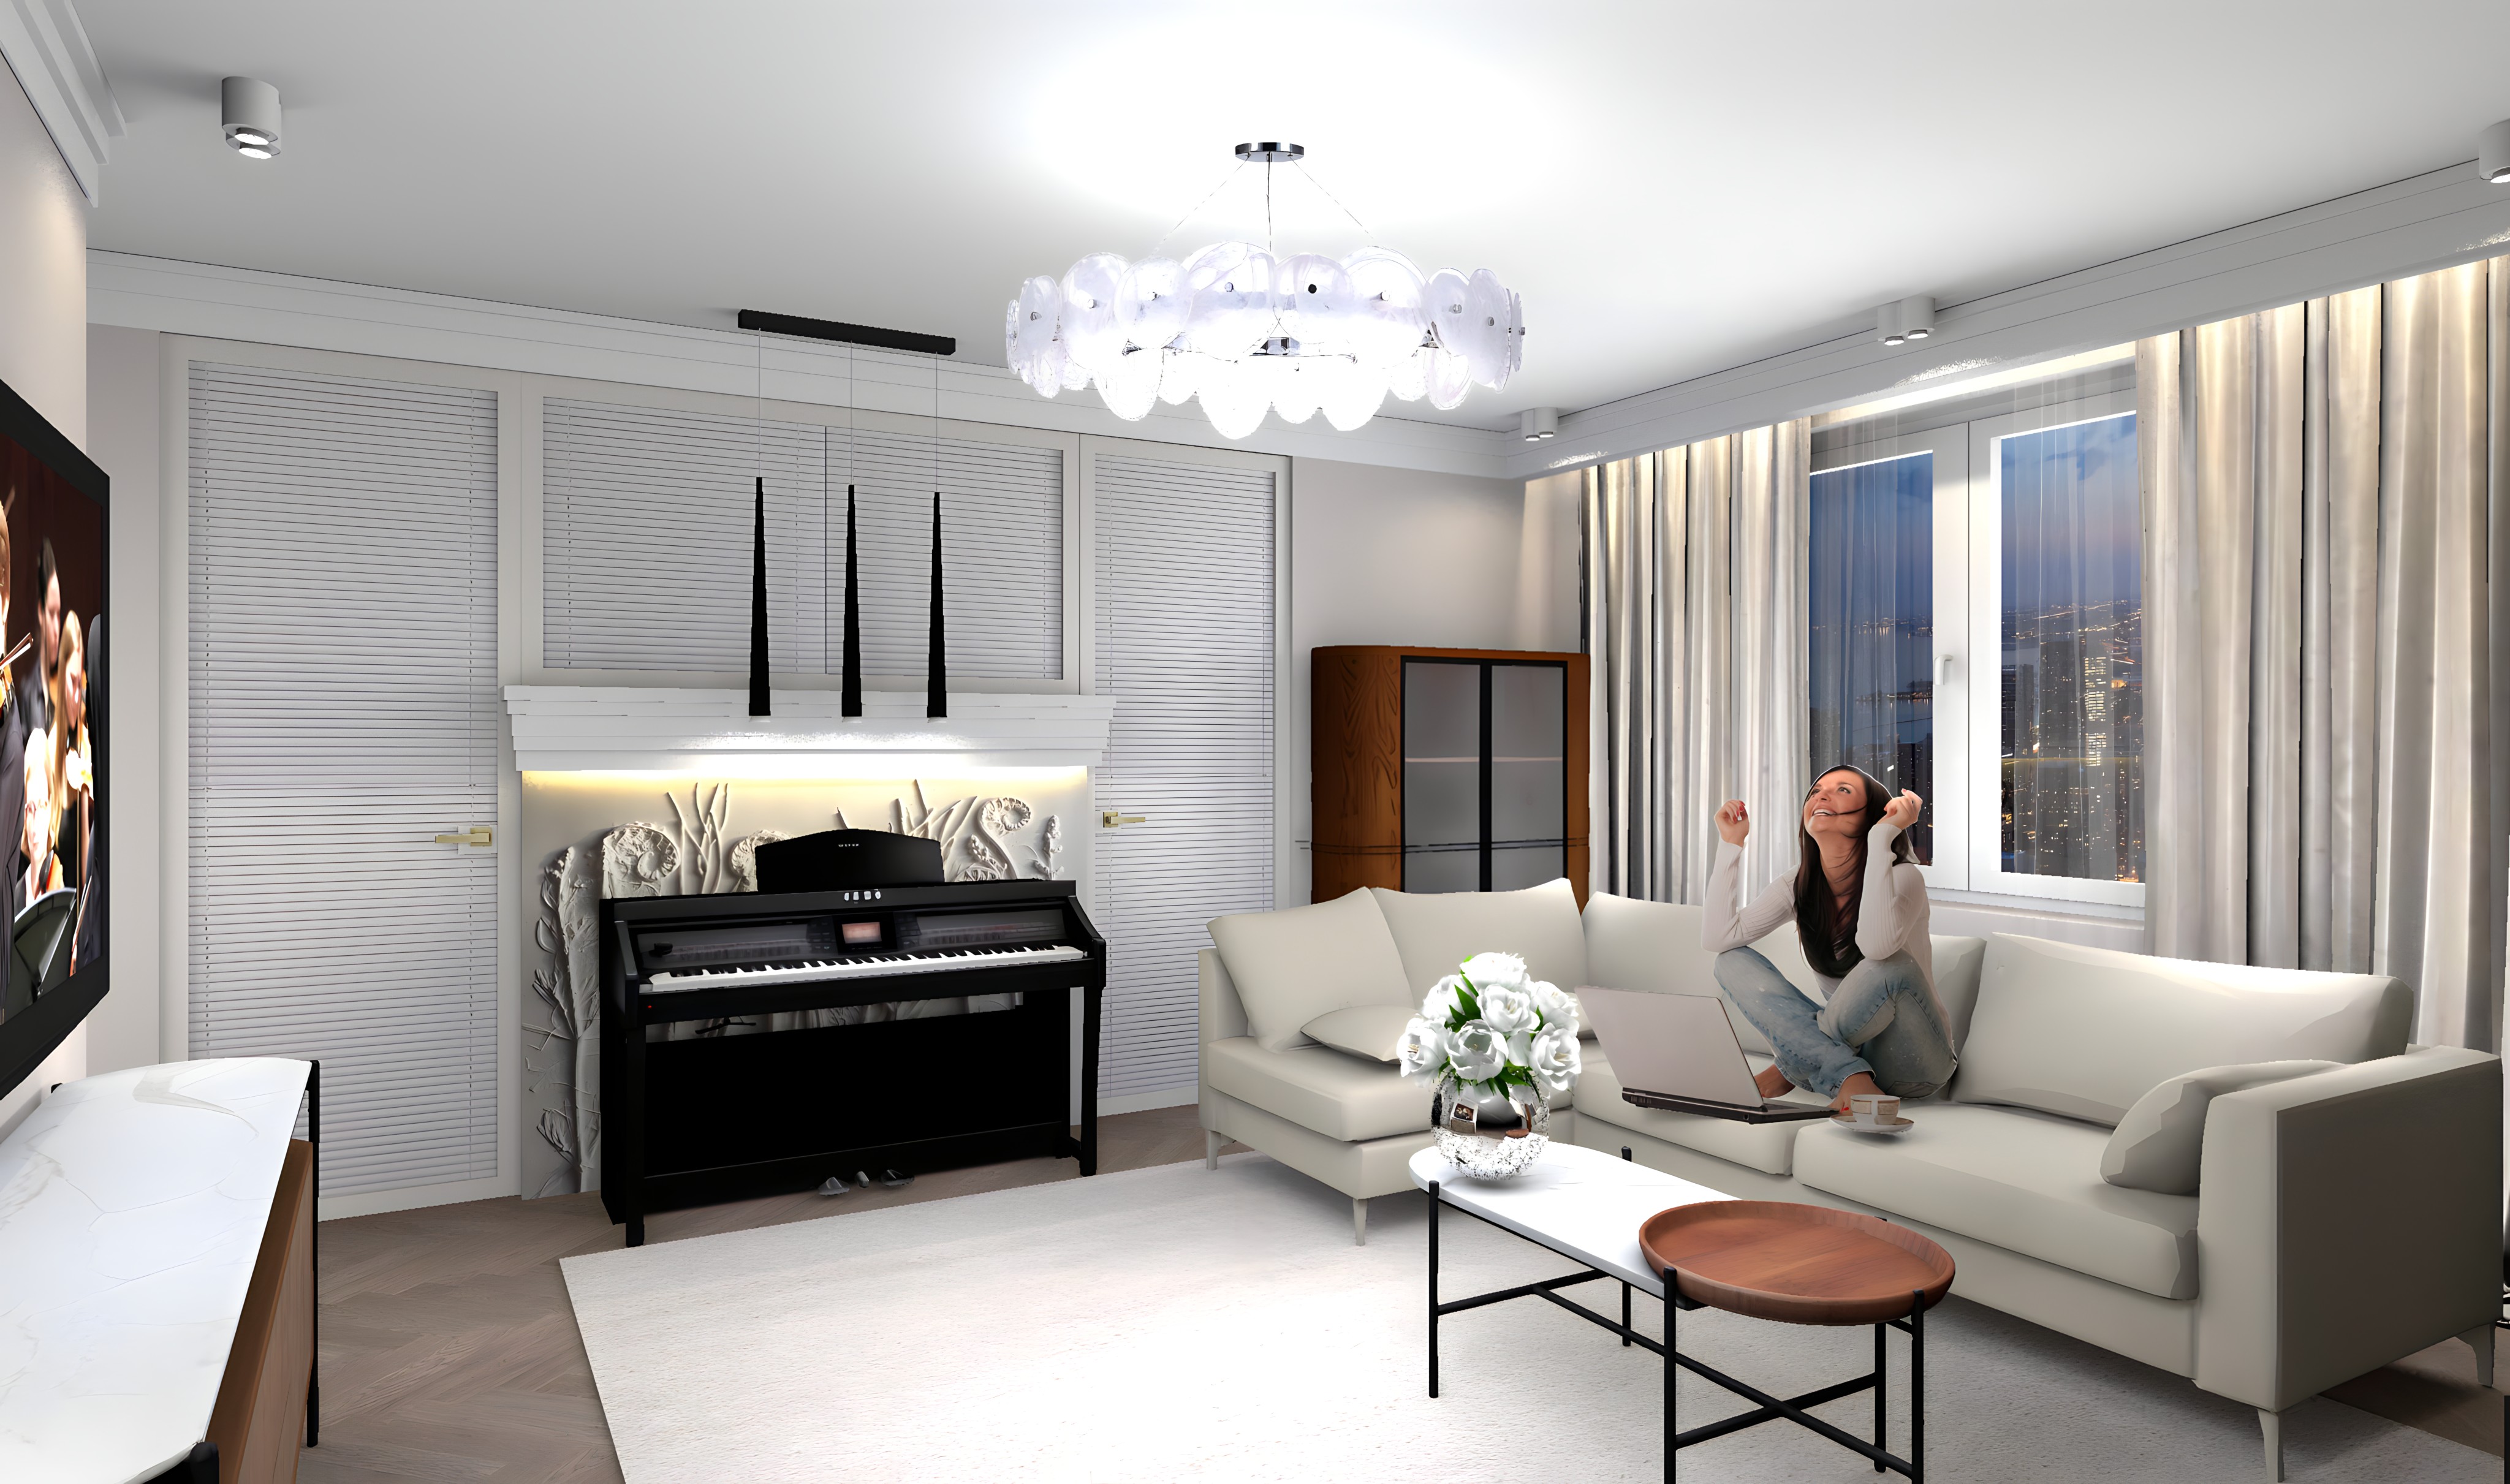
vertical lines are needed to maximize the match of this real photo with the lines of the render. Then I made the room to real dimensions and put all the pieces of furniture with real dimensions in their places. I found the point in the 3D scene of the room from which I took the photo, it needs to be done very precisely for the effect in the clip. There are still some items in the actual room, but there is a chandelier and a sofa, for example. I photographed the sofa right in the room. then I removed the background on the photo and made a 3D model of this sofa using Trellis. All the sizes are real, it has become similar to a real sofa in the rendering, it stands in its place, as in reality now. A chandelier is a photograph on a box with invisible sides. This method is more effective for rendering, because it allows you to make an imitation of a glass chandelier more realistic than just a model (which, moreover, I did not find). As a result, the final render with lighting turned out like this. I took almost all the objects from photographs using AI Trellis. This rendering will be the basis for the video clip and will appear in this form only at the very end. The tilt of the viewer's head in the render is 0. This also allows you to draw all vertical lines without blockages.
I decided to make a video clip based on this scenario - first a photo of the room appears, then an empty 3D room is superimposed on it, then all the pieces of furniture begin to appear in turn to the music. To do this, I started making renders, removing one item each time. There were 10 such renderers. There was an empty room at the end. I named all the renderers by the count of 1-10. I made the quality of these individual renders 2000 in width, the duration of each render was at first 1.5 hours, then with the reduction of the model objects, the time of the last render turned out to be 30 minutes. It took me a whole day. But eventually I was able to start editing the video clip. It is clear that now the first frame after the real room is render number 10. And so on until the first number. in turn. The result is a video clip with a fixed point of shooting up to the tenth subject (before the girl appears on the couch). After that, I connected the Hailuo AI to get the movement. Here is a video clip in the end . In the process, I realized that it is possible to improve video quality by connecting AI with a photo quality enhancement feature. I tried ReminiAi, this site improves the quality twice, everything is free. This way, you can make the original renderers at a slightly lower quality and then improve them through AI. This trick saves a lot of time and preserves the feeling of picture quality. Unfortunately, I couldn't make the video for free. But I started three pieces of the video from the beginning frame of the previous video. And this first frame was improved every time with the help of Remini. Therefore, the video quality was slightly preserved.
Russia
Joined: Aug 13, 2022
Post Count: 617
Status:
Offline
Re: create a room clip using AI. Instruction manual
I found a compromise solution to improve the video. I receive video sections from which I can make long movements through AI Hailuo with a length of 5 seconds (this is the site limit). It is this free limit (it is called a preview here on another site) of 5 seconds that you can download for free on the site x-design.com , any videos in terms of volume are improved there. But the first 5 processed seconds of them can be downloaded for free. The video quality is greatly improved, and it is these 5 seconds that are needed. Then you can glue a video clip from such improved pieces. I tried it - it works great, in any case, the image sharpness is pleasantly high-quality.