US
Joined: Jan 8, 2018
Post Count: 1
Status:
Offline
Exporting the 3d rendering without a background
Since there is no way to export the drawing without a background, what is the best method to edit the background out so that it can be transposed into another application? Without adobe photoshop?
France
Joined: Nov 7, 2005
Post Count: 9439
Status:
Offline
Re: Exporting the 3d rendering without a background
If you choose a gray color for the ground, it will be easy to select the ground part from the rendered image with the Fuzzy Selection tool in Gimp. Then invert the selection and copy / paste the remaining image in a new image with a transparent background.
----------------------------------------
Emmanuel Puybaret, Sweet Home 3D creator
Denmark
Joined: Jul 7, 2013
Post Count: 637
Status:
Offline
Re: Exporting the 3d rendering without a background
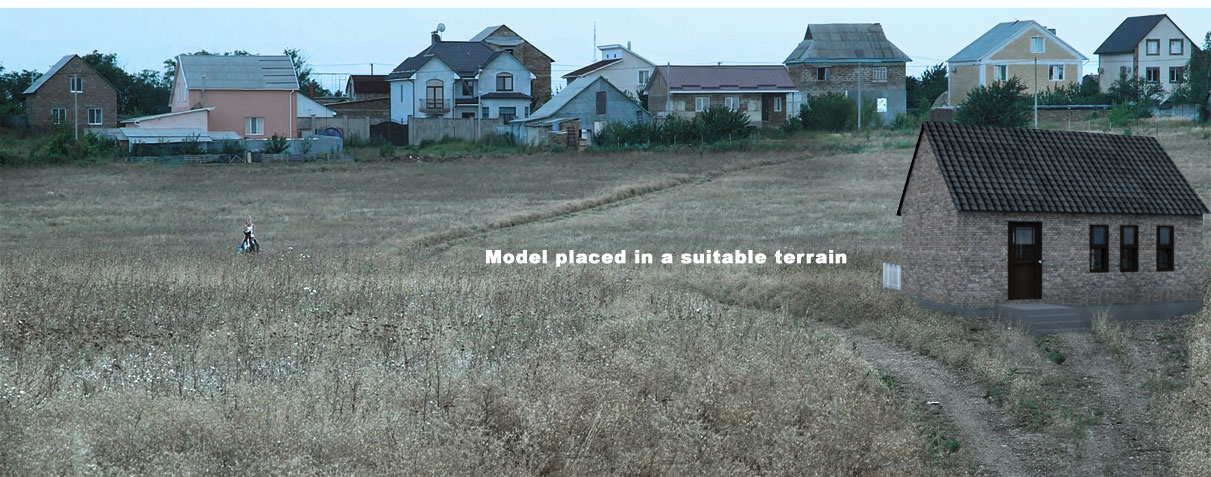
In my opinion the method that gives the best result, is to first render in Q4 with a textured or coloured ground, preferably a ground colour that is close to the colour of the surroundings your model is to be placed in. For best result, I use a textured sky instead of the blue default.
I have made a quick example project:
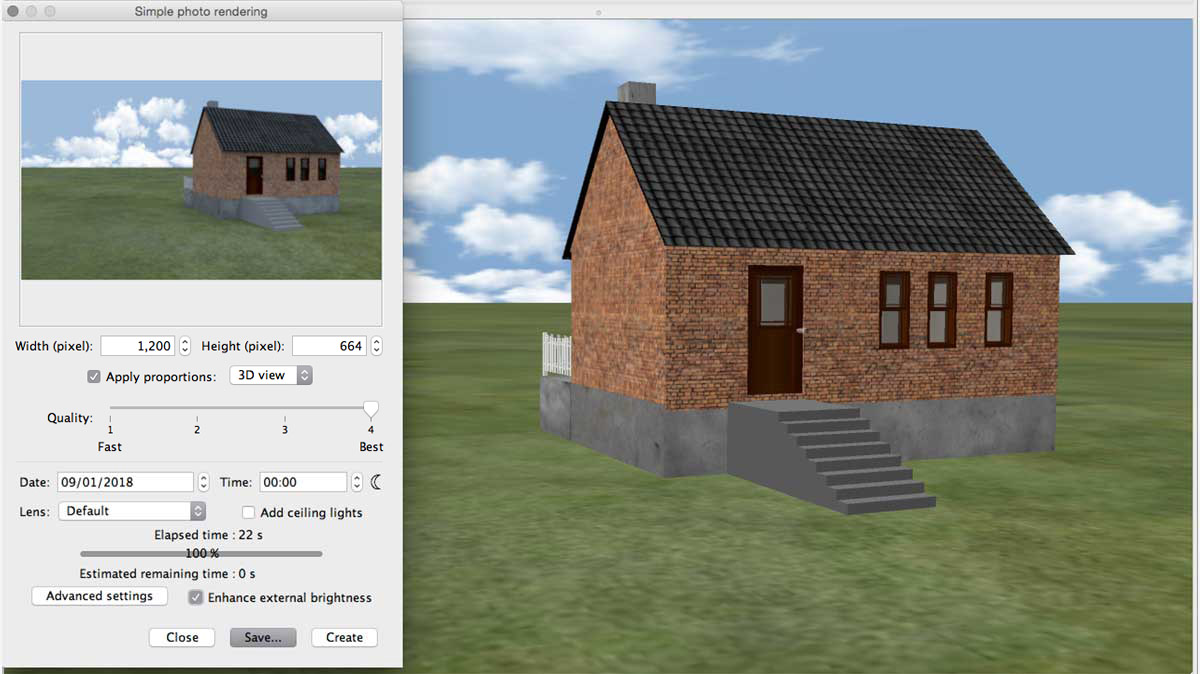
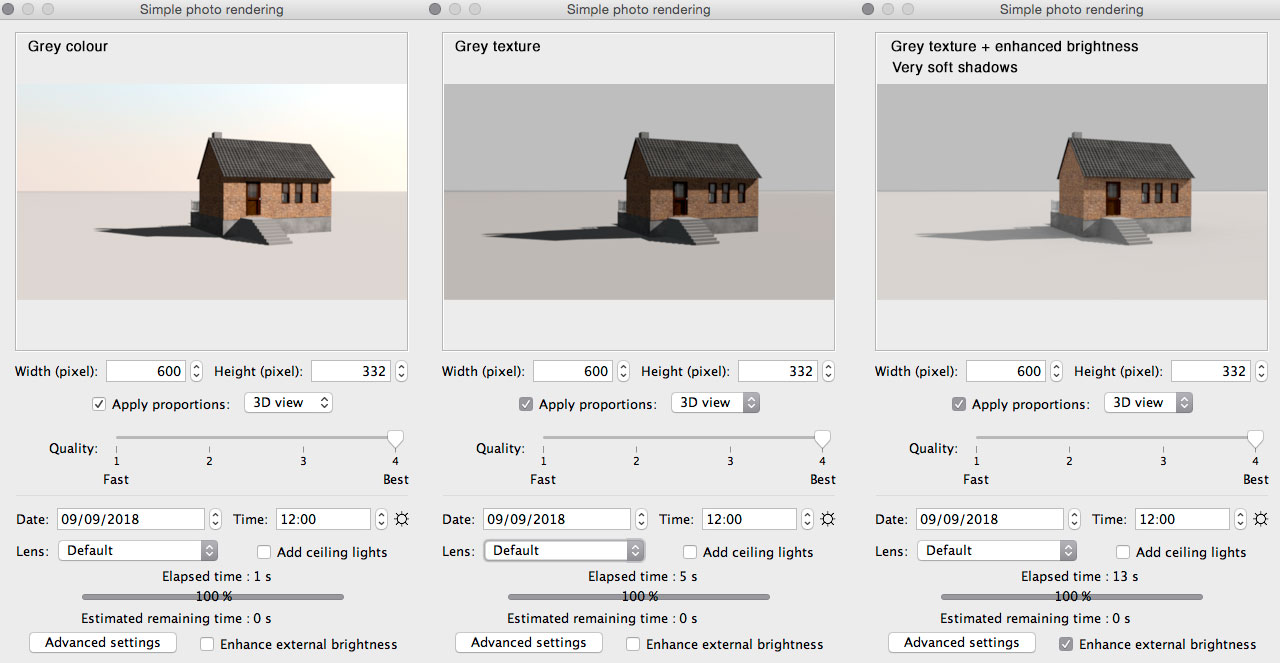
First I have made a Q4 rendering with night-setting (moon) and enhanced external brightness selected:
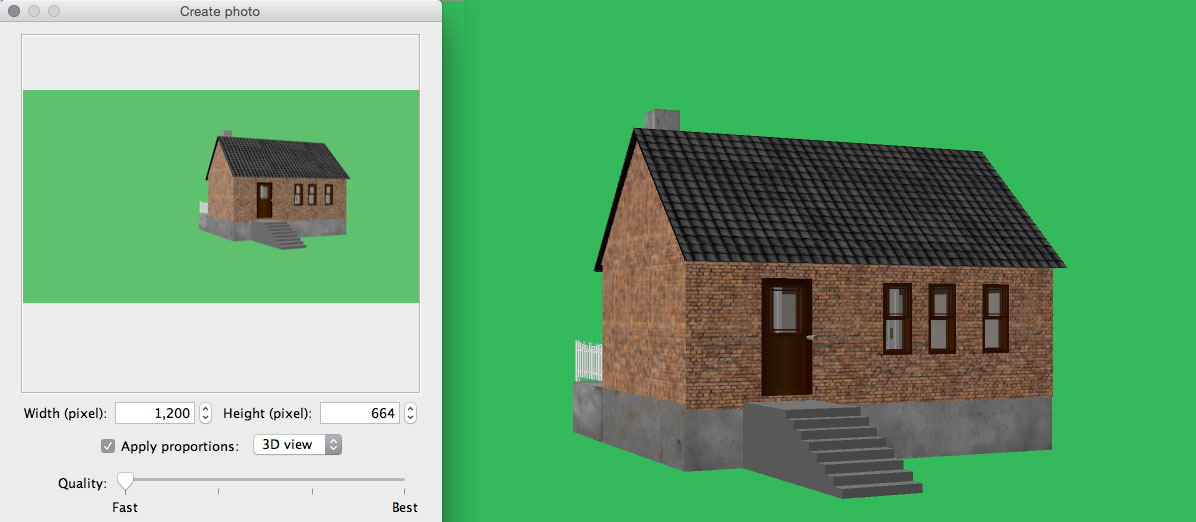
Then I have substituted the ground and the sky with a green texture. and rendered an image with the Q1-setting:
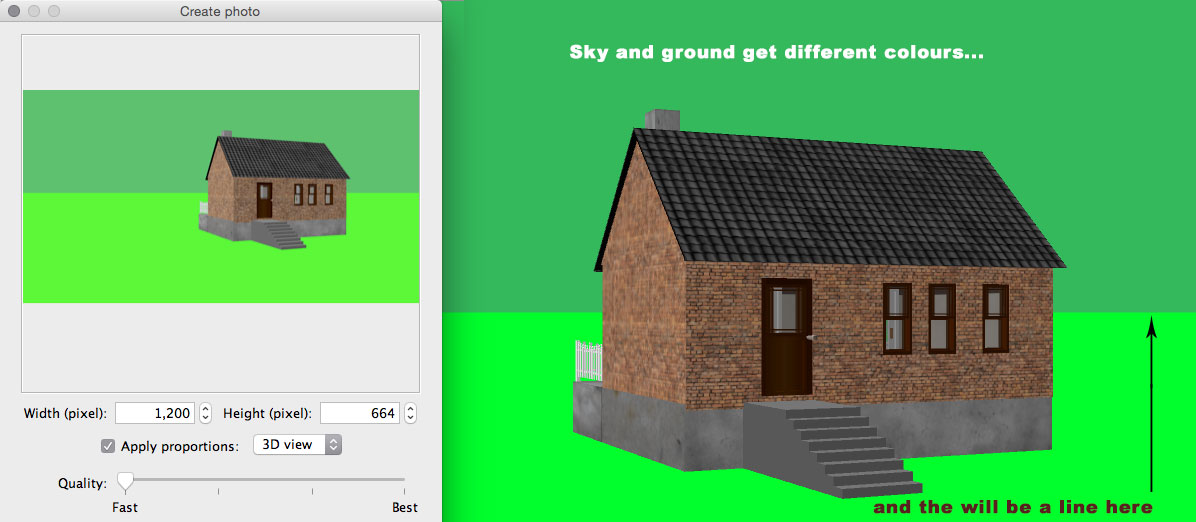
Why I use a green texture and not a green colour:
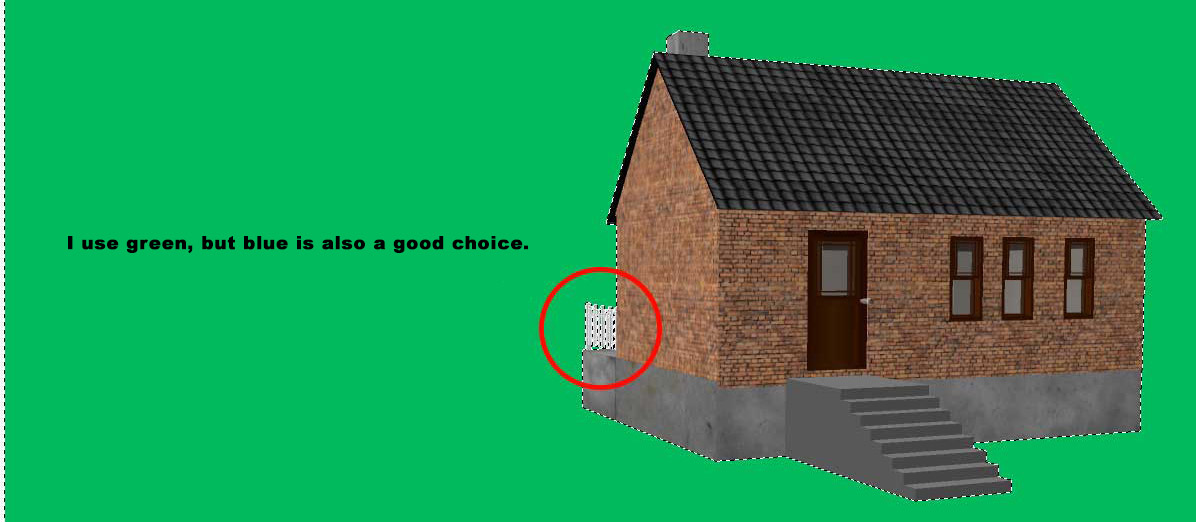
I'm not using grey, since grey is a colour that is often present in several elements in a project. When selecting a colour range, quite often a lot more than the background is selected, and even after cancelling the unwanted selections, there can still be problems with more detailed elements, like fences and garden furniture.
In my opinion, contrasting colours like green or blue makes it a bit easier to select:
The (ugly) model placed in a suitable landscape:
Cec
----------------------------------------
[Edit 1 times,
last edit by Ceciliabr at Jan 9, 2018, 6:44:09 PM]
France
Joined: Nov 7, 2005
Post Count: 9439
Status:
Offline
Re: Exporting the 3d rendering without a background
Thanks for this detailed way to remove the background You're right, using a background color very different from the color used on the border of the house can help, but if you want to keep the shadow of the house itself, using gray will help to get faster results. You should also take care of the threshold of the Fuzzy selection tool, to ensure you select only the pixels you need to remove.
----------------------------------------
Emmanuel Puybaret, Sweet Home 3D creator
Denmark
Joined: Jul 7, 2013
Post Count: 637
Status:
Offline
Re: Exporting the 3d rendering without a background
if you want to keep the shadow of the house itself, using gray will help to get faster results
Maybe you are right.
My main concern is that whatever background colour is used to create a mask, it should be applied as a texture and not as a colour from the colour picker.
Let me introduce another method:
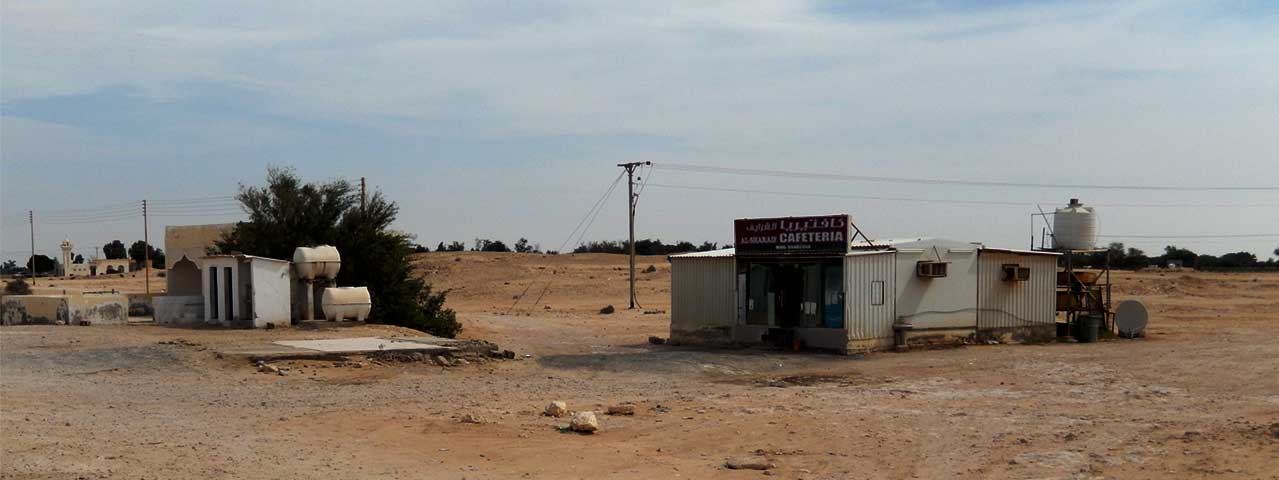
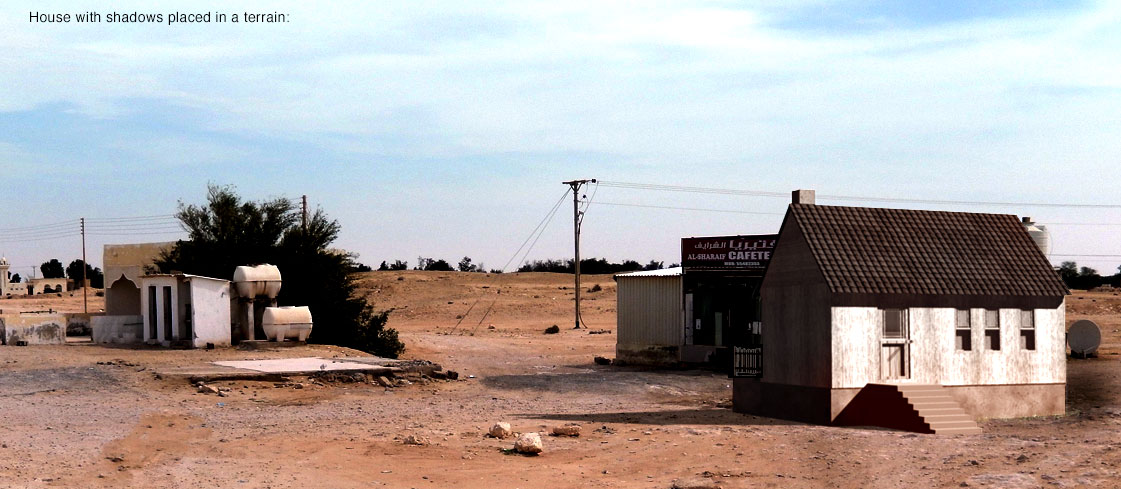
Let's say we are challenged to destroy a picture of a beautiful landscape by embedding a house that is so seamlessly integrated that you have to look twice in order to notice it. We want a fast and easy method for masking, and we want to preserve the ground shadows.
Let's say the landscape looks like this:
This method is based on using a white background – that is: a white texture applied to both the ground and the sky. Using white as background is especially good for shadows, since white can be blended out.
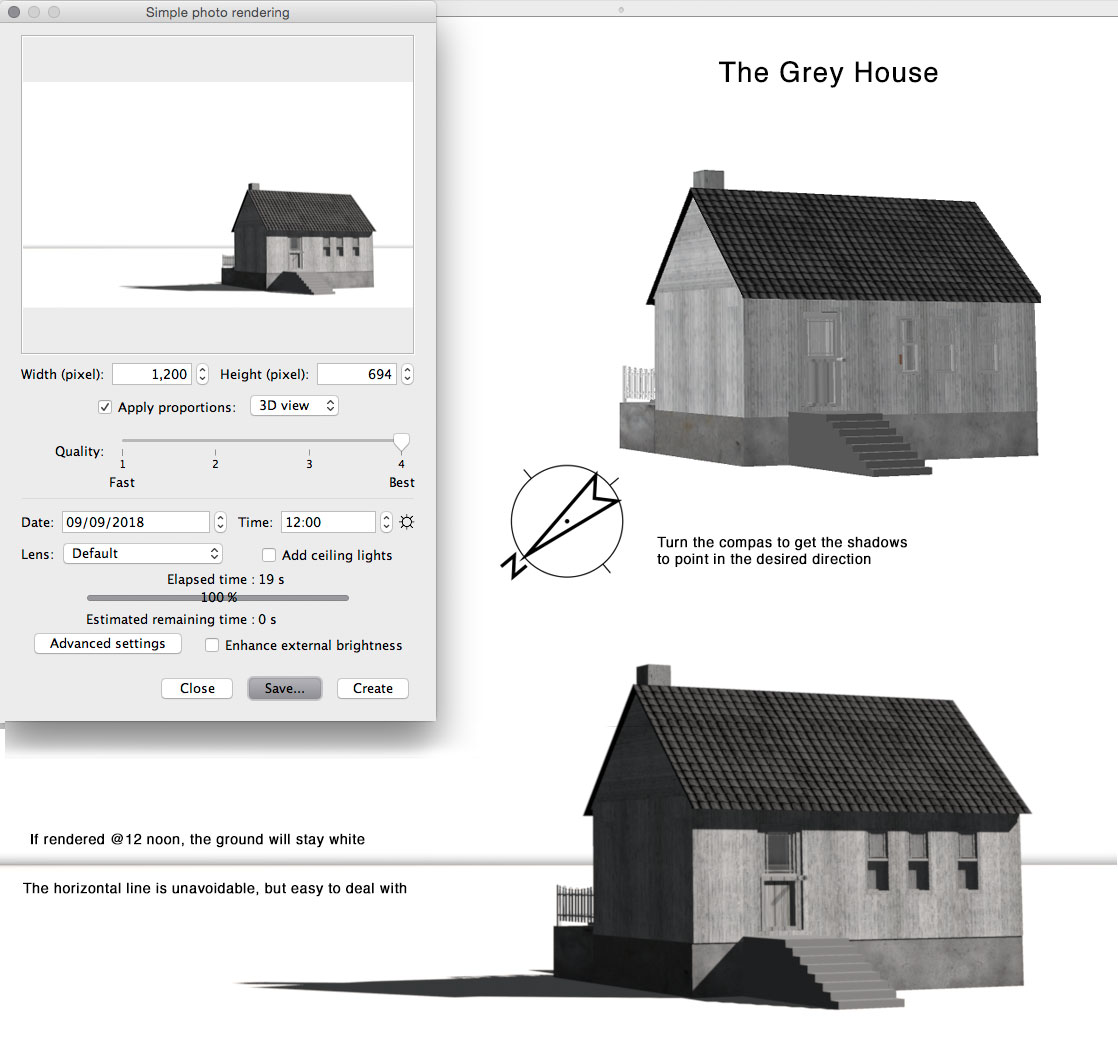
I need to mention that this method has one drawback: The model must be rendered at 12 o'clock noon only. If not, the ground will be coloured, which will complicate the process. But its easy to point the shadows in the right direction by rotating the compass, and the length of the shadows can be adjusted by altering the date.
I don't know Gimp, but from what I have heard and read, Gimp is a lot like Photoshop, and even better, in some peoples opinion. Since Photoshop is the program I'm familiar with, I will use Photoshop and assume that the same will be possible to do with Gimp.
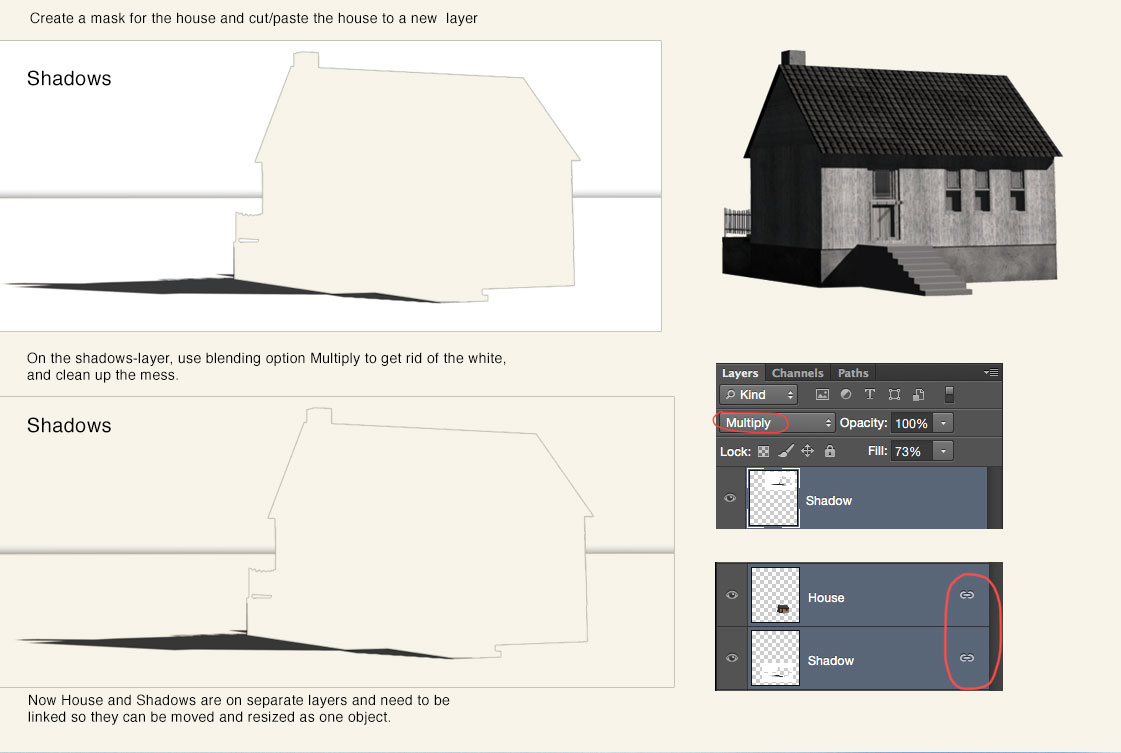
The house: I use the same house as in my last post, but I will change the texturing on the walls, door and windows, and I will change the texture on the ground and sky to a solid white. Then rotate the compass so the direction of the shadows match, and adjust the date to get the right length. Methods for aligning, scaleing, finding the right angle and creating perspective with the right field of view-settings is another discussion, but when that is done, it's time to render:
The process:
Place Q4 rendering on a layer on top of the landscape, make a Q1 rendering and layer it on top of the Q4. Select white on Q1 to create a mask for the house, invert the mask and use it to extract ( cut/paste) the house from the Q4 layer to a new layer. Then delete the Q1 layer, since there is no more use for it. Now the project has three layers – the landscape at the bottom, the shadows on a white background is layer two, and the house is layer three.. Set the blending to Multiply for the shadows layer. The white becomes invisible, leaving only the shadows as an overlay on the bottom layer.
Clean up any mess and mix and blend the layers until the result is acceptable. Easy?
Well, this process is quite easy, but getting a good result involves more than just masking and blending. Retouching, color correction and filtering has to be done, and I would assume there are lots of usable tools for that in Gimp.