Step-by-Step Guide to Creating a Sloped Ceiling with a Window
This tutorial demonstrates how to model a sloping ceiling featuring a window using Sweet Home 3D. By adjusting wall heights and utilizing the software’s 3D view, you can simulate realistic attic or loft spaces. The guide covers setting varying wall heights to achieve the slope and inserting a window into the inclined surface, allowing for accurate and visually appealing interior designs.
With Sweet Home 3D, you can’t incline neither a wall, nor a window, except when you import them as an object.
This tip shows the way to tilt an item; in this case, a wall with a window in it, which will be used as a sloping ceiling (Sweet Home 3D is able to compute a sloping ceiling but you can’t add any window to it).
You will find this tip useful to design a room under a roof, for example.
Create your space
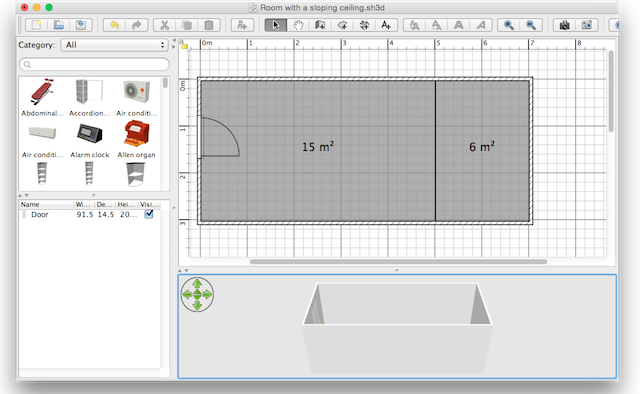
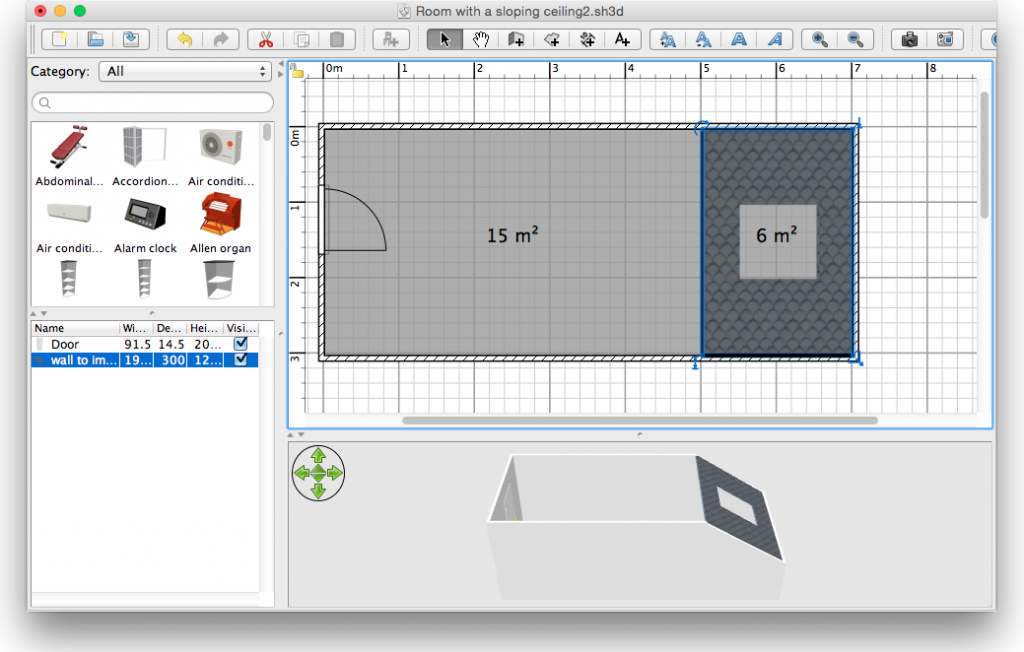
Draw 2 separated rooms:
- One with the flat ceiling,
- The other will receive the sloping ceiling.
In our example, we drew first the rooms with the Create room tool and added the walls by double clicking in each rooms. Then, we removed the wall in the middle.
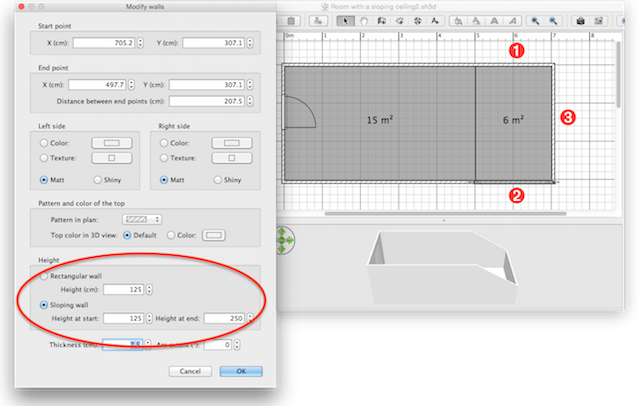
Prepare the 3 walls where the sloping ceiling will appear:
- Change the height at end for the wall number 1.
- Change the height at start for the wall number 2 (see the picture below).
- Change the whole height of the rectangular wall number 3.
Prepare the sloping ceiling
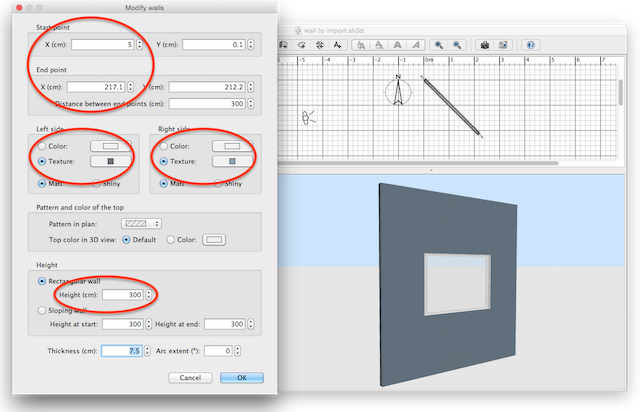
Open a new file and create a simple inclined wall, with an angle approximately equal to the sloping ceiling one. This will be your sloping ceiling.
Then insert a window in the middle. Here we chose a Fixed window.
For a good rendering, you’d better:
- Choose the aspect of each wall side, especially if you want to apply textures inside the room.
- Check the height of your wall which should match the length of wall 3 of the room.
- Check the difference between abscissa X of the start point and the end point : it has to be approximatively equal to the length of walls 1 and 2.
Pay attention because you won’t be able to change this wall, once imported as the “ceiling” object (it is quite difficult to have the perfect result at the first time…).
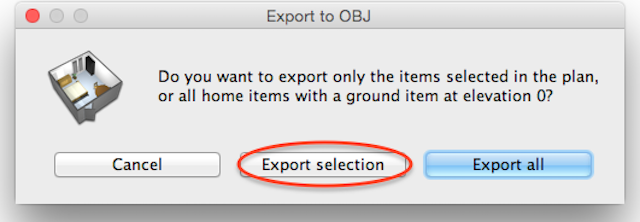
Export your sloping ceiling
Ensure that the wall and the window are selected.
Choose 3D view > Export to OBJ format menu item, enter a file name and when prompted, select Export selection option.
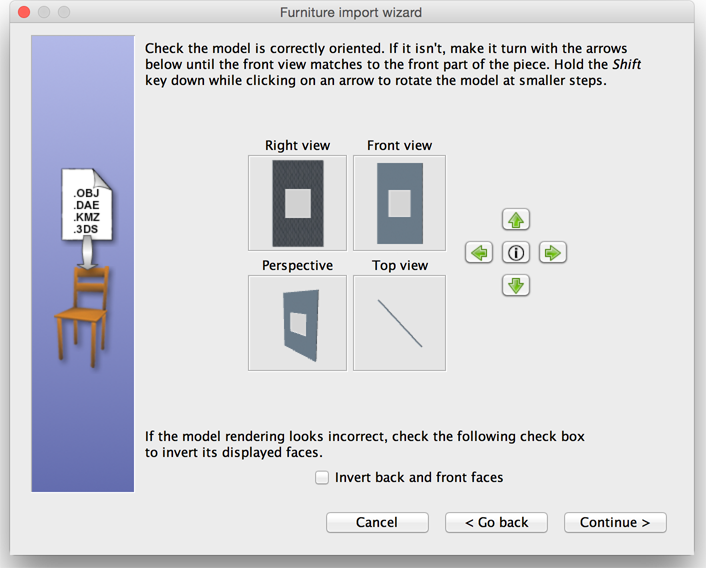
Import your sloping ceiling
Come back to your main file. Choose Furniture > Import furniture menu itemand select the file of your exported model (your wall).
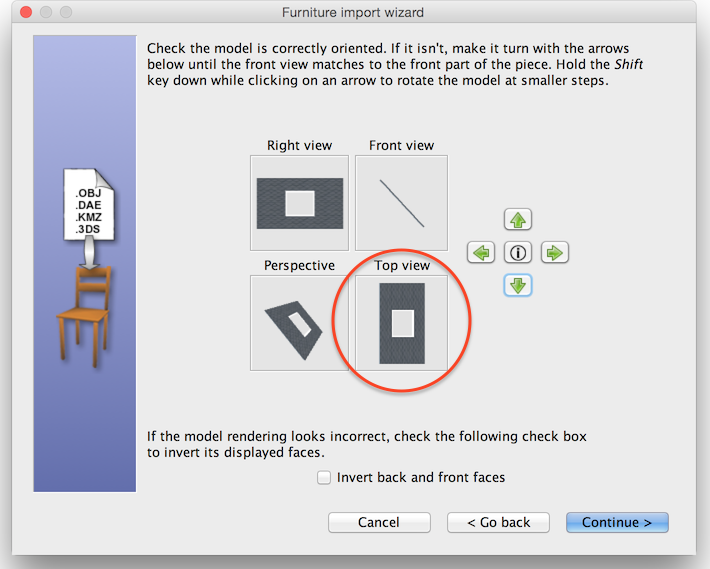
At the second step of the Furniture import wizard, change the orientation of your wall to display entirely the roof side in the Top view.
At the third step of the Furniture import wizard, adjust the elevation of your ceiling.
Finally, place your imported ceiling at the desired position. You might have to correct its height to get a perfect result.
To view the ceiling of the main room from bottom, don’t also forget to double click on the main room and select the ceiling Visible check box in its modification pane.
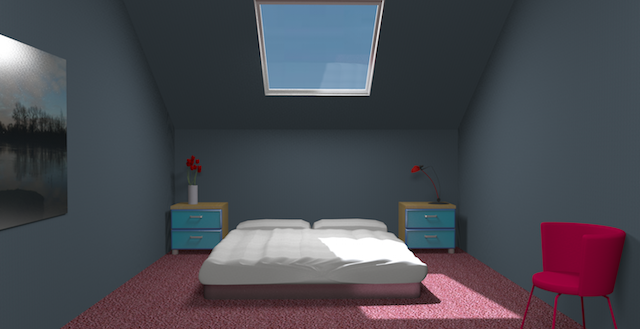
Now you are ready to decorate your room (make your sloping ceiling invisible temporarily to add any kind of objet under it more easily).
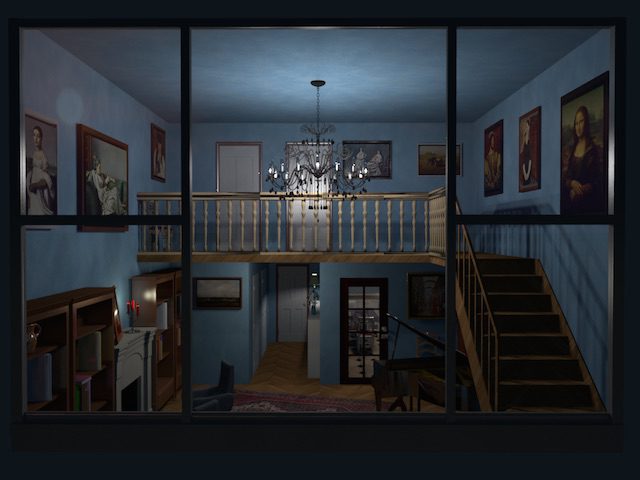
Enjoy your life style under the roof!
If you’re interested, the home file created in this tip is available in the file RoomWithSlopingCeiling.sh3d.
[Note than from version 5.5, you can rotate furniture different from doors and windows around their horizontal axis, so you might find it easier to design the wall with its window vertically, and rotate it afterwards once imported]