How to print a grid in the plan or display it in 3D
Do you need to print a grid under your design? Or maybe display a grid in the 3D view?
This three-in-one tip is for you!
Printing the grid behind your 2D plan
When you use Sweet Home 3D, a grid pattern is visible by default in the plan, but you might have noticed that its scales changes when you zoom in/zoom out. It is one of the reasons why this pattern never appears when you print your plan. But if you want to print a grid, there’s still a solution: Sweet Home 3D lets you import a background image showing such a grid, and printing a background image is something Sweet Home 3D can do!
Follow the guide…
Pick up a grid found on the Internet, or design the one you want using spreadsheet software and a simple image tool. For example, you can create a square grid with Open Office, then copy / paste it in Paint under Windows or Preview under Mac OS X. Think about the number of lines the grid should show and the thickness of these lines, according to the scale at which you’ll print your plan.
In our example, the drawn flat is small and we chose a 400 x 500 cm grid pattern, with a decimeter division, and thicker lines at each meter.
Once the image of your grid is ready, select the Plan > Import background image menu item.
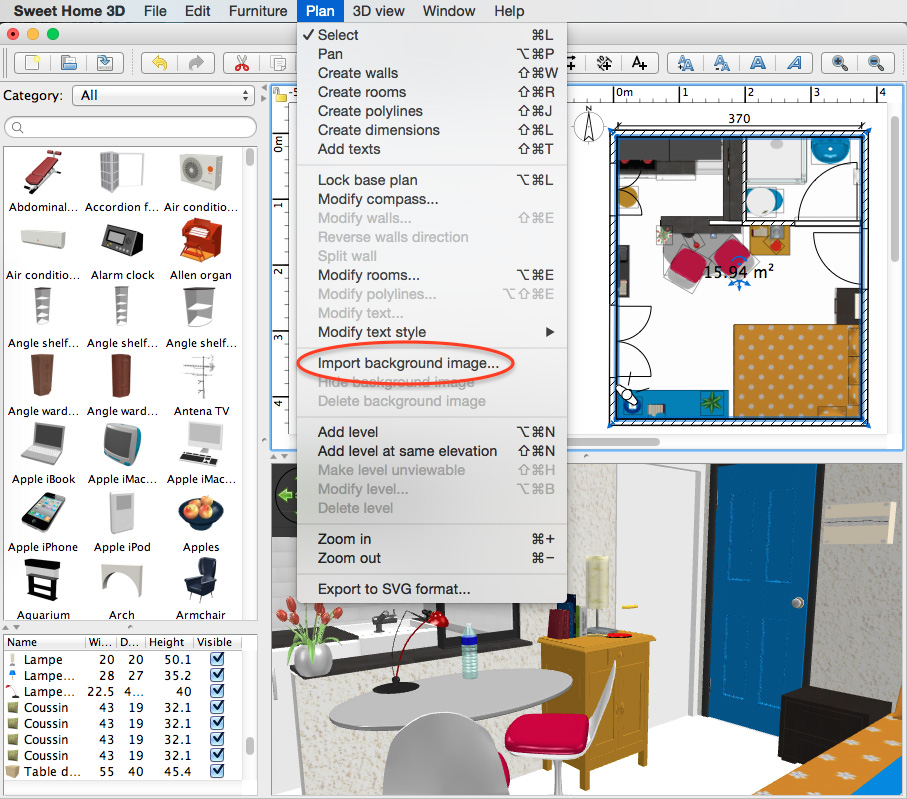
Then follow the steps of the Background image wizard:
- Click on Choose image and select the file of the pattern you designed or downloaded from the Internet (you may also drag and drop the image in the wizard dialog box). Click on Continue button.
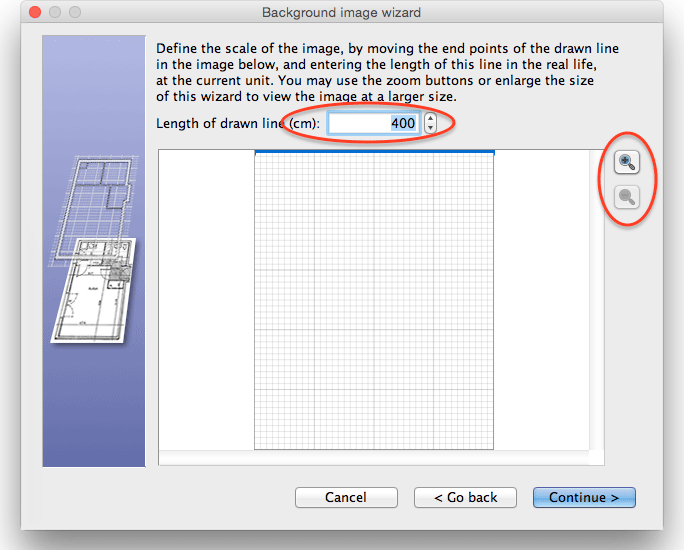
- Define the scale of your pattern according to your plan. In our example, the pattern was 4 meters wide (i.e. 400 cm). To ensure that the length of the scale line shown in the wizard is correct, use the zoom buttons shown at the right.
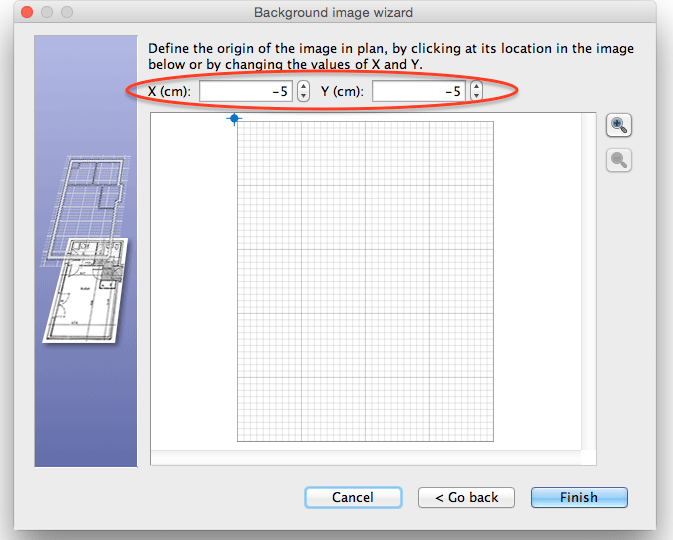
3. Define the origin of the plan. In our case, we want the pattern to begin at the internal corner or a room surrounded with 10 cm thick walls that start at the point (0, 0). As Sweet Home 3D built the walls symmetrically to this point, the coordinates of that corner are at (5, 5), and the background image should be placed at (-5, -5).
Click on Finish button to let your grid appear under the plan. Don’t forget to hide the default grid in the preferences pane to prevent your grid and the default grid to be shown together, as the following image shows.
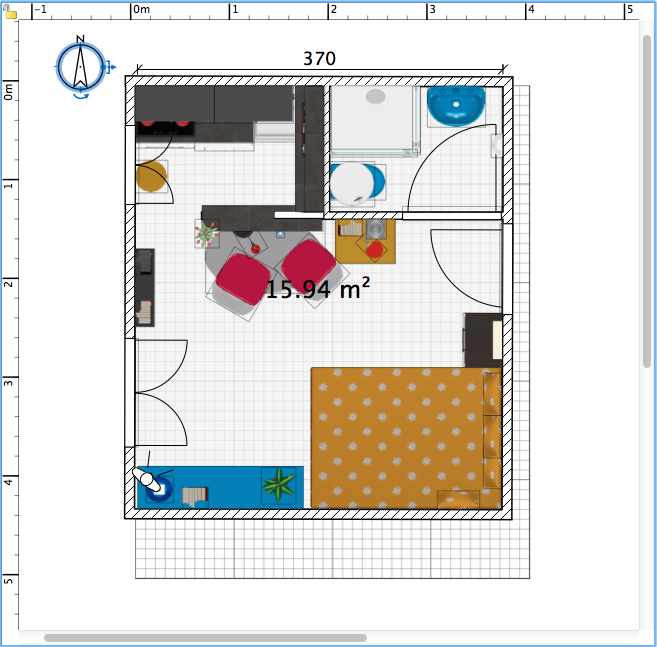
You might need more than one attempt to show the grid at the right scale and position. If the grid is incorrectly shown, just modify it with the Modify background image menu item which now appears in the Plan menu. You can also hide or delete this background image, or isolate it a separate level that you’ll hide, letting you show an other background image if needed.
Showing the grid in the 3D view
If you want to show a grid in the 3D view, you will have to use a grid as a texture. This grid can be applied on the whole 3D ground using the dialog box shown by 3D view > Modify 3D view, and you may also apply it only to some rooms as shown here.
Select the room(s) where you want to display that grid, then choose the Plan > Modify rooms menu item, and click on the texture button of the Floor section.
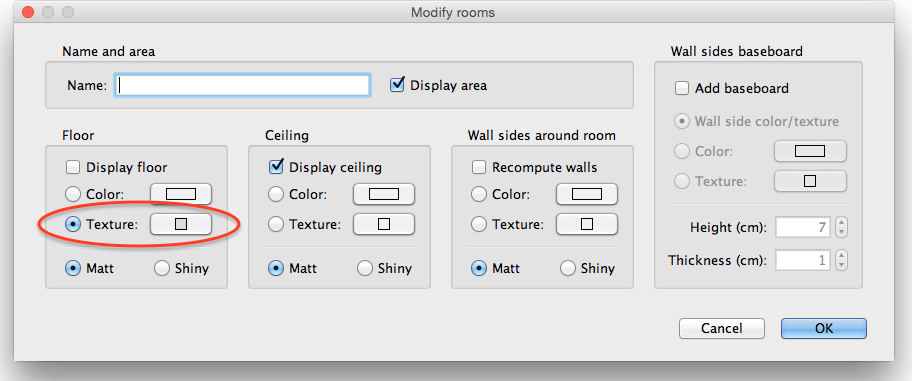
Click on the Import button shown in the Floor texture dialog box to import your own grid pattern as a texture.
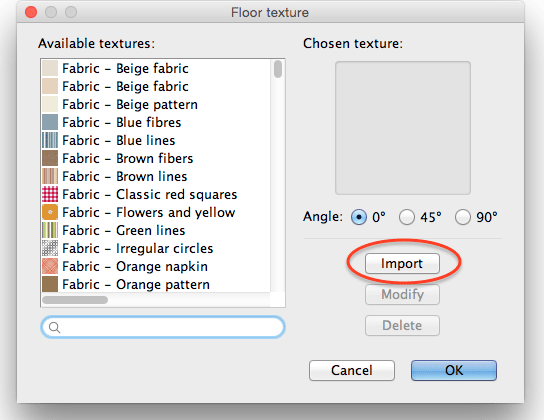
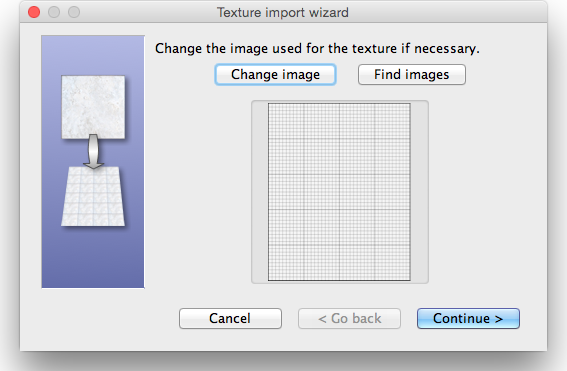
Like in the background image wizard, the Texture import wizard guides you:
- Click on the Choose image button to select the file of your pattern (or drag and drop it in the wizard). Then your grid appears in the wizard.
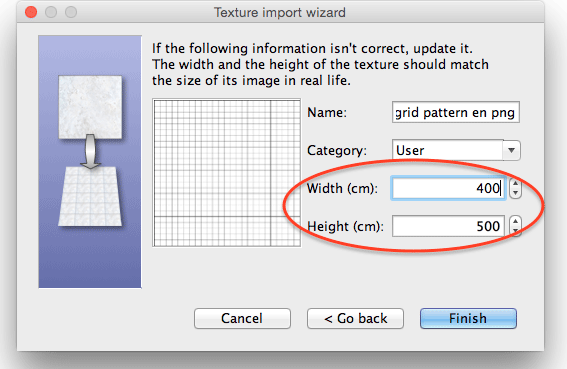
2. Click on Continue and change the category of the imported texture if you want, as well as its width and height (in our example, it’s still the same 400 x 500 cm pattern).
Your grid now appears, similarly to any kind of floor texture as shown in the following screen capture.
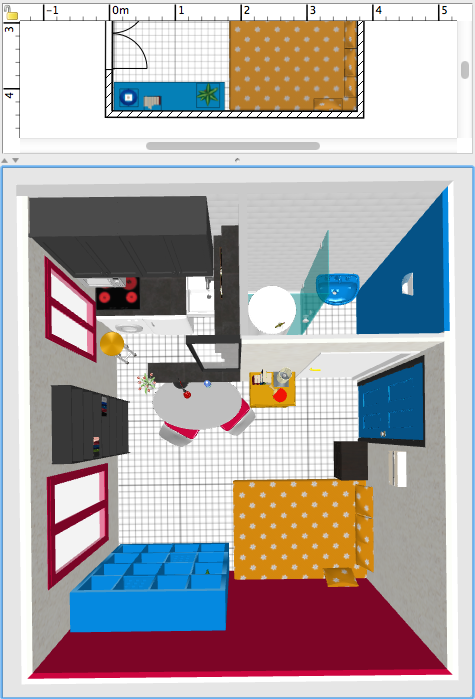
Showing the grid in the 3D view on top of the floor texture
You might prefer to show the grid on top of the color or the texture used for the floor of your rooms. In that case, you can use a box with a transparent grid.
To achieve this, add a simple box available in Miscellaneous category to your plan.
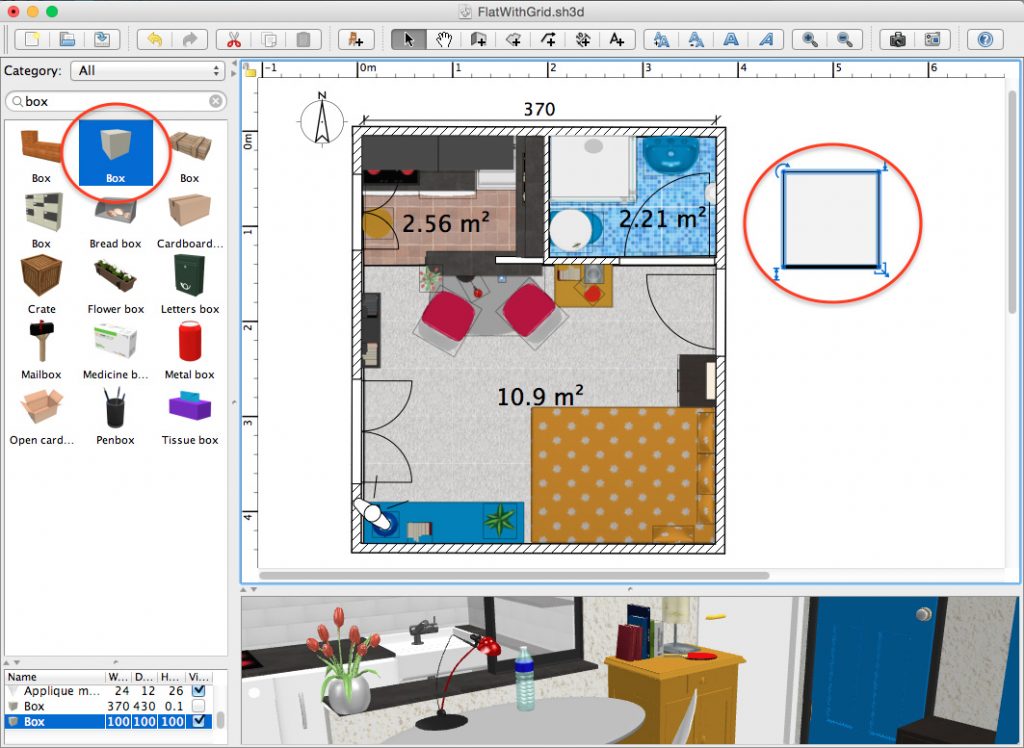
Then select the Furniture > Modify menu item for this box and modify its texture, importing this time a grid image drawn on a transparent background color (download one on the Internet or use a image tool like Gimp to make the white part of your previous grid transparent and save it as PNG file with transparency).
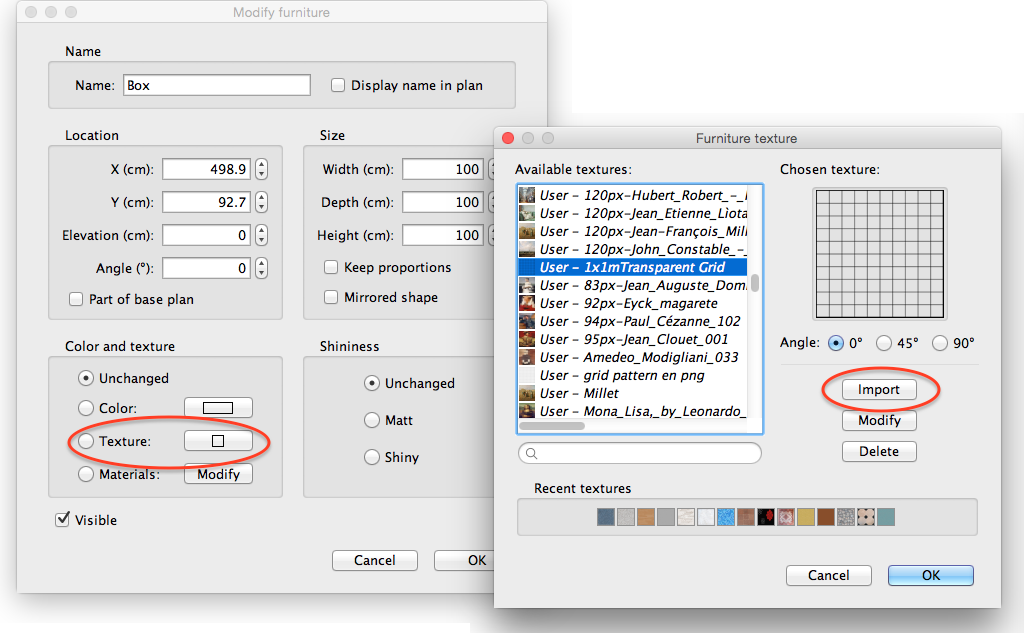
Finally, resize and place your box where you want to show the grid. In the following image, it occupies the whole flat with a 0.1 cm height.
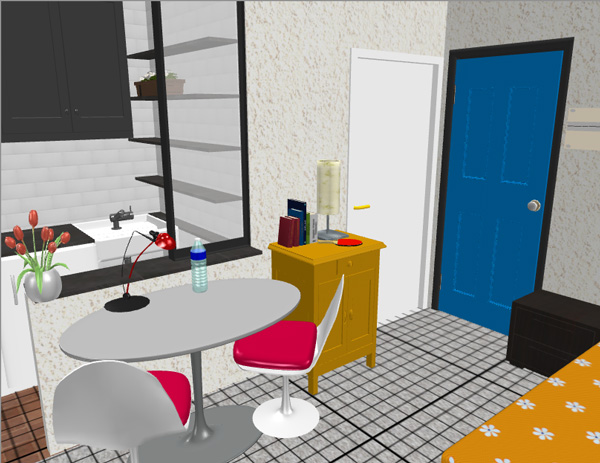
This second way is also interesting because, if needed, you can hide this grid in the 3D view without deleting it, simply by unselecting its Visible check box.
If you’re interested, the home created in this tip is available in the file FlatWithGrid.sh3d (4.6 MB – designed by eTeks and distributed under CC-BY license).


Leave a Reply