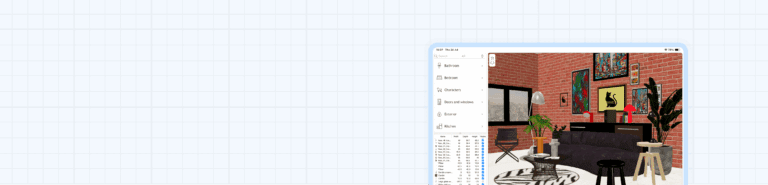
How to show interior parts hidden by walls
You want to show the external structure as well as the interior parts of the beautiful home you designed? Or more simply, do you need to view inside a small room where walls hide its interior?
This tip shows several ways to make walls partially invisible, in order to get nice 3D views. All homes handled in this tip come from Sweet Home 3D gallery.
Changing walls transparency
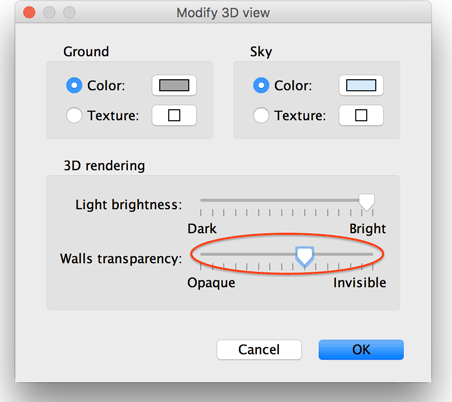
This is the quickest way. By default, walls are opaque in Sweet Home 3D, but you can make them partially invisible, by selecting the 3D view > Modify 3D view menu item and changing the position of the Walls transparency slider from Opaque to Invisible.
Once walls transparency is changed, all walls, floors and ceilings will be more or less transparent in the 3D view. This can be useful to view the interior of a small room when you want to adjust the position of some objects hidden by some walls.
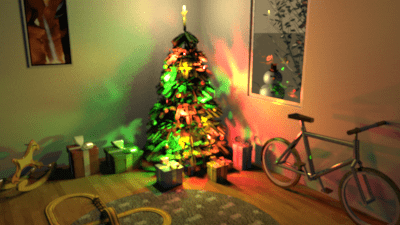
Changing this setting will make walls and floors transparent also in images created with the photo creation tool at the two first quality levels, like in the following screen capture that shows the image created from SweetHome3DExample8.sh3d file with half transparent walls.
A half transparent setting has no effect at the two best quality levels in the photo creation tool. At these quality levels, only a full transparent setting will actually hide walls and floors, like in the following image computed at the best quality level.
Cutting out walls with invisible boxes
To be able to view the interior of a home behind its walls, another solution may consist in cutting out the walls which hide objects. It takes longer to prepare this kind of design but, once installed, the effect of this solution can be easily disabled and enabled again.
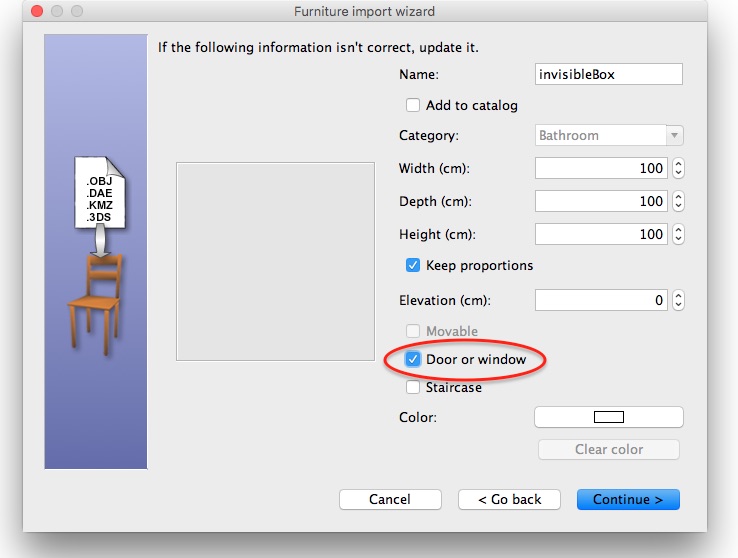
Like in the tip How to create a hole at the bottom of a wall, this tip requires to import an invisible box as a door or window: download this invisible box 3D model, import it in Sweet Home 3D with the Furniture Import > furniture menu item, taking care to select the Door or window option at the third step of the Furniture import wizard, as shown below.
Once the invisible box is imported and added to the plan, it will make a hole in all the walls it intersects (but with no effect on objects of another kind). You may resize it (preferably without magnetism in this case) and elevate it, depending on the effect you want, like in the following image showing SweetHome3DExample5.sh3d file.
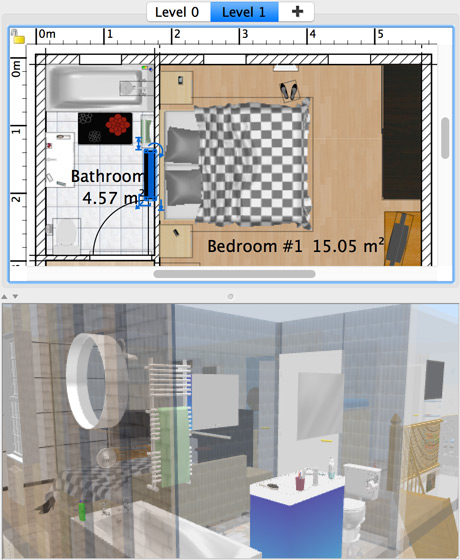
Oops! Sorry. Bad example, it’s restroom! 
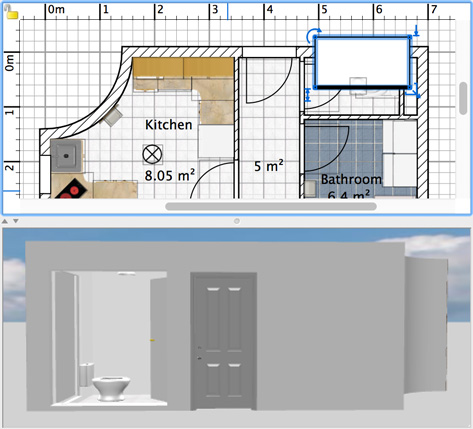
Let’s try this solution at the upper level of the house available in SweetHome3DExample7.sh3d file, with a larger invisible box and hiding some windows, doors and other objects in the way.
As the photo creation tool takes into account invisible boxes at the two best quality levels, you may use this solution to render nice images like the following one.
Note that you may revert to the original design easily with the use of the Visible check boxes available on hidden objects, as well as on this invisible box which effect will be disabled when its Visible check box is unselected. No risk to lose anything!
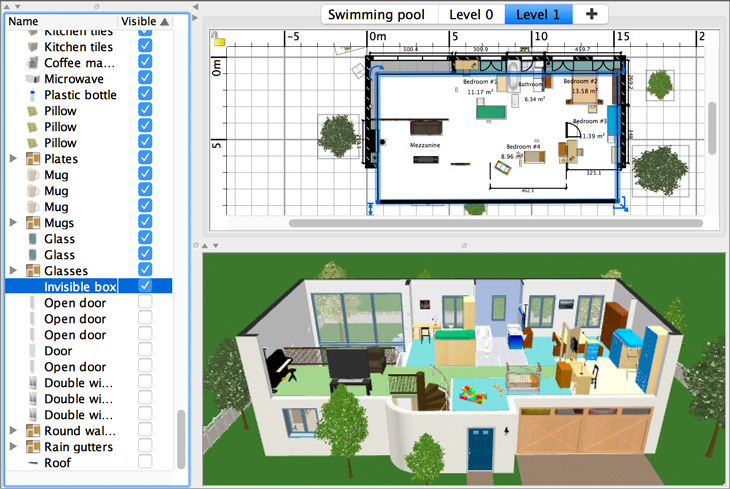
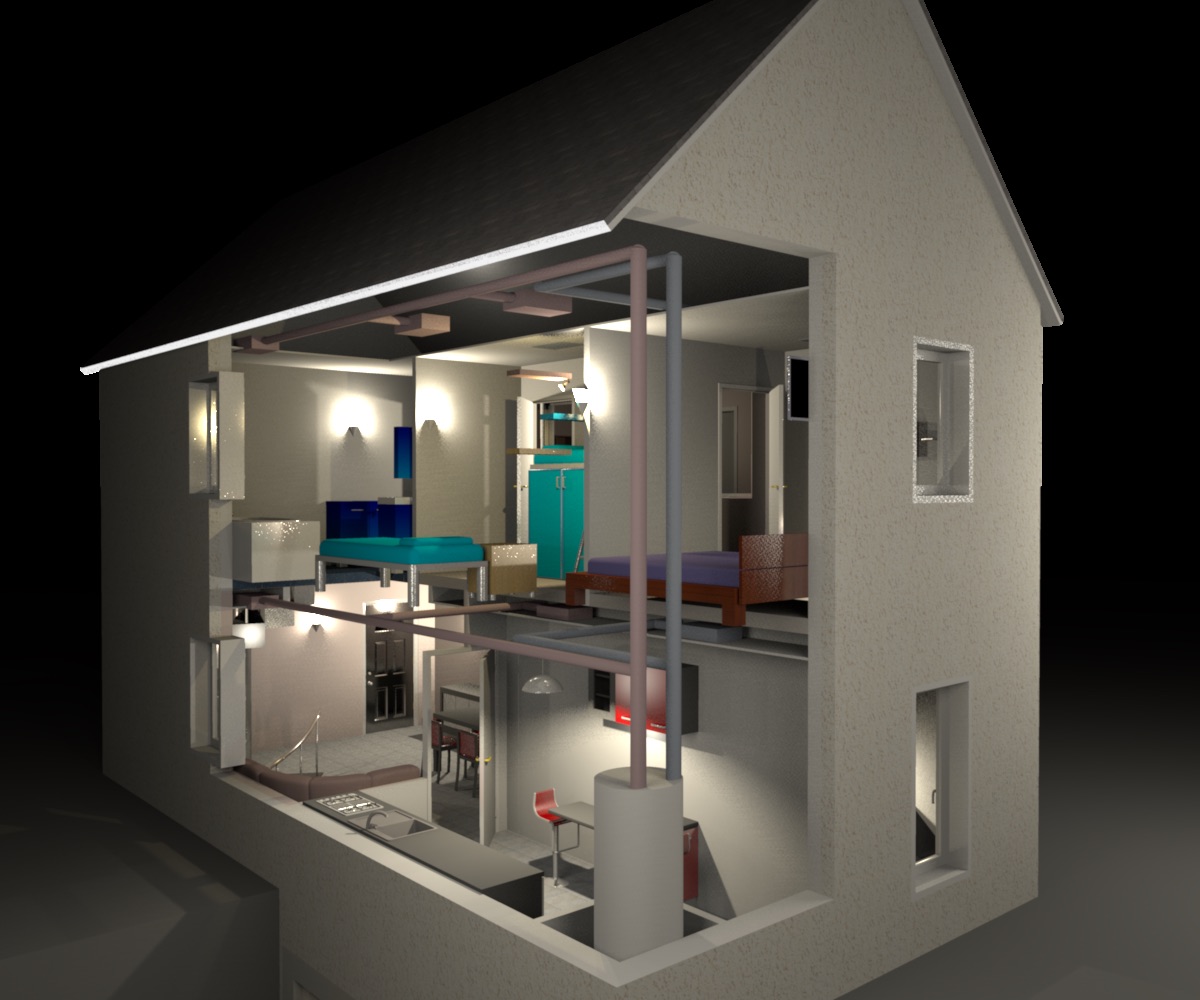
You may also find convenient to use several invisible boxes at different elevations to design a more complex 3D view with walls cut out at different heights, like in the following example based on SweetHome3DExample3.sh3d file, where invisible boxed were grouped to make it easier to disable their effect when not needed.

Last but not least, it is also possible to cut out floors with invisible boxes. Just import again the invisible box 3D model, this time selecting Staircase option at the third step of the Furniture import wizard.
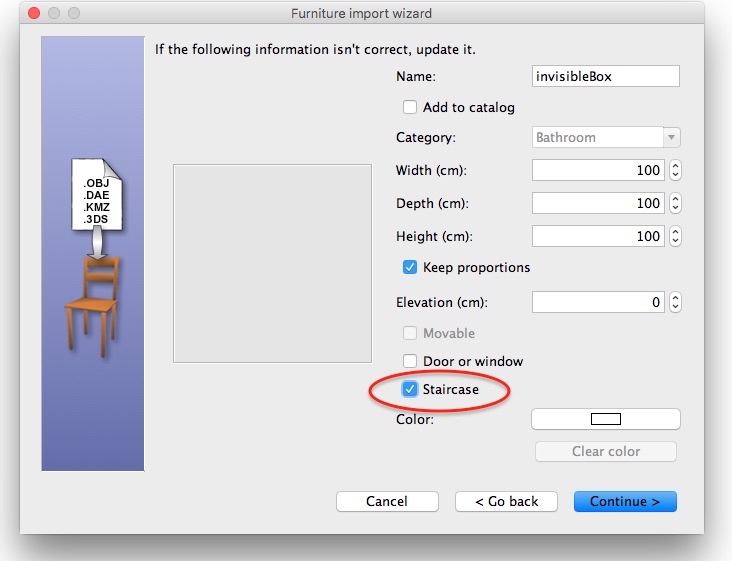
Like any staircase in Sweet Home 3D, this invisible box will make an hole in the floors between two levels (see also the tip How to customize staircases).
If you group an invisible box marked as Door or window with one marked as Staircase of the same size, you will even obtain a special box able to cut out walls as well as floors, as shown in the following image based on SweetHome3DExample6.sh3d file.

And now, you can show the nice heating system you have designed through the house with the photo creation tool.
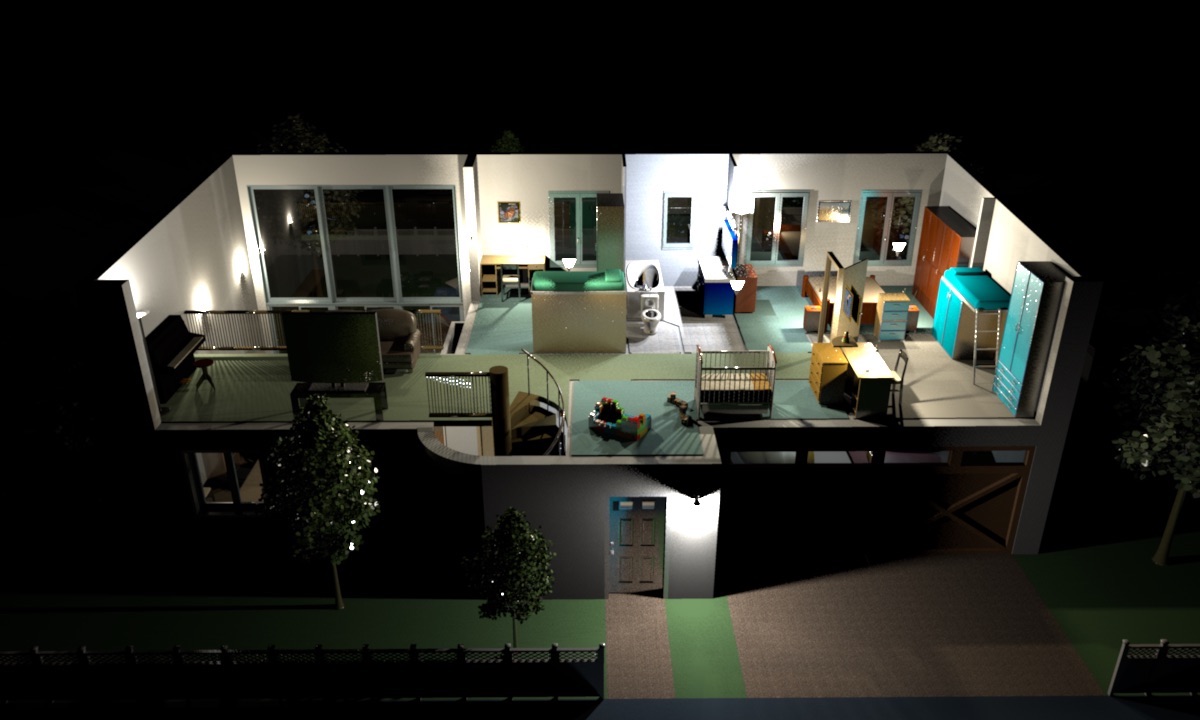
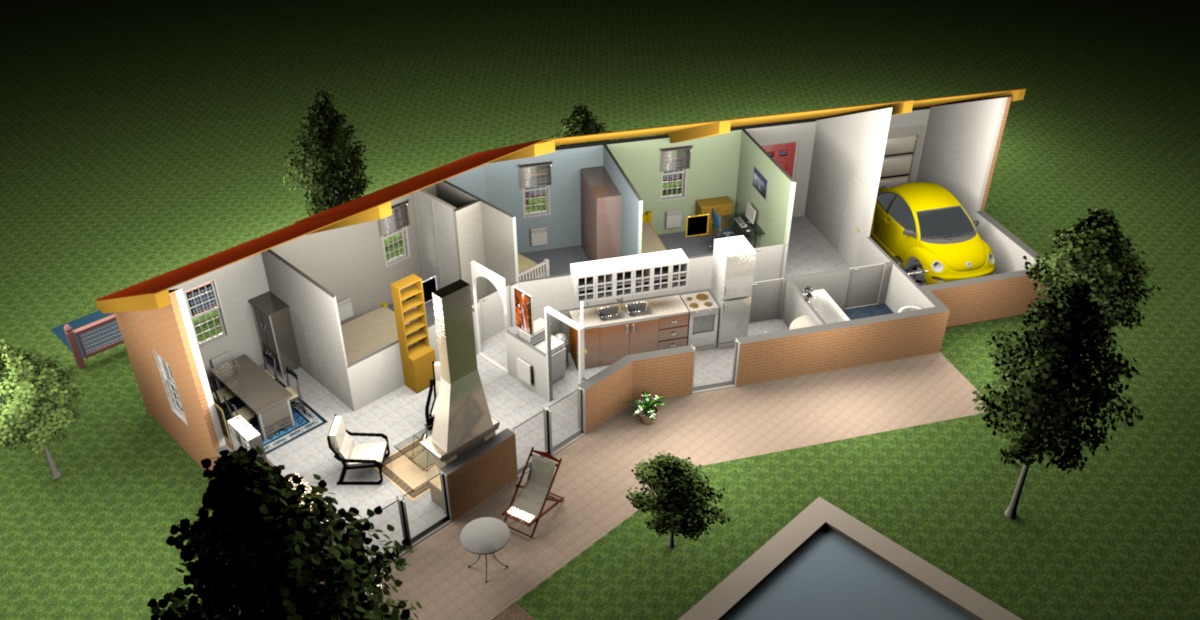
Changing the walls height
A third solution consists in reducing the height of the walls which hide the interior. The height of walls, set by default to 250 cm in preferences, can have any value. To change quickly the height of a set of walls, select them by holding the shift key when you click on each of them and/or by drawing a selection rectangle that includes walls (and possibly objects of another kind), then choose the Plan > Modify walls menu item to enter the wall you want.

Here’s the result you can get with SweetHome3DExample4.sh3d file, with a height of 100 cm for the front walls and half of the roof hidden.

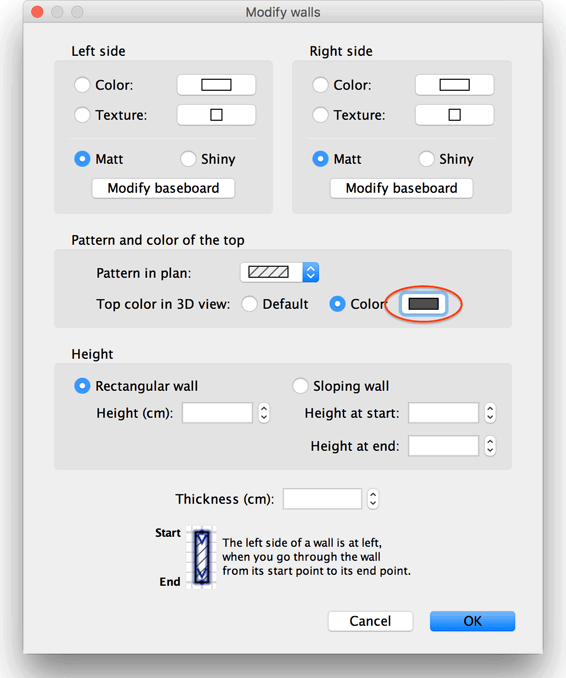
You can also improve this image by replacing the default rendering of the top of walls with a uniform color. As you’ll probably want to set the same color for all tops, just choose the Edit > Select all menu item, then the Plan > Modify walls menu item and choose a color for the top of the walls (note that on small screens, this option doesn’t appear when only one wall is modified).
The following image computed with the photo creation tool shows the final result you can get at night time with a few lights added to the scene.

Neat rendering, isn’t it?
Unfortunately, none of the previous tips cut windows, but to get a perfect result like in the following image, you can follow Okh’s advice explained in this thread in the forum: import the half window and half door he designed (don’t forget to select the Door or window option in Furniture import wizard), and use them to replace the windows and doors which look too high.
The main problem of this last tip is that you have to resize walls once the image has been computed if you don’t want to lose their original height, unless you save modifications in another file or store modified walls and windows in separate levels to change their viewability afterwards. But it gives very nice results, the reason why we couldn’t resist to try this tip a last time with SweetHome3DExample11-HouseWithTerrace.sh3d file.