


How to design a split-level house
How to design a split-level house
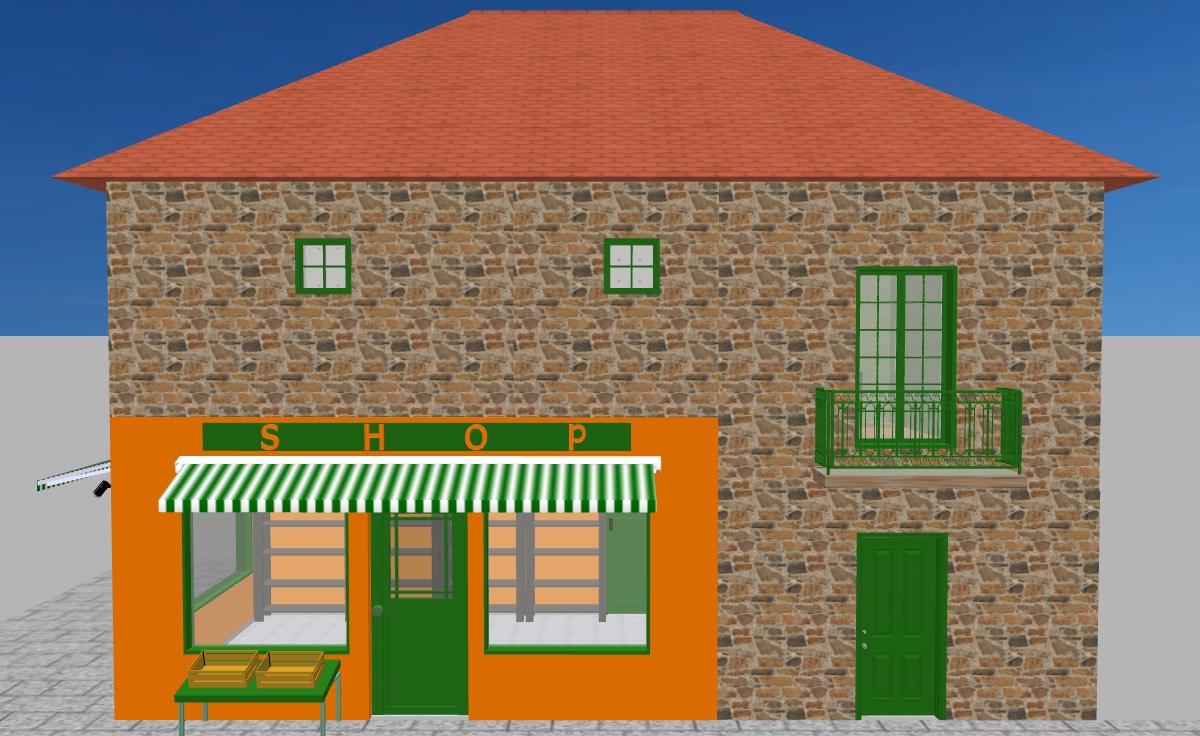
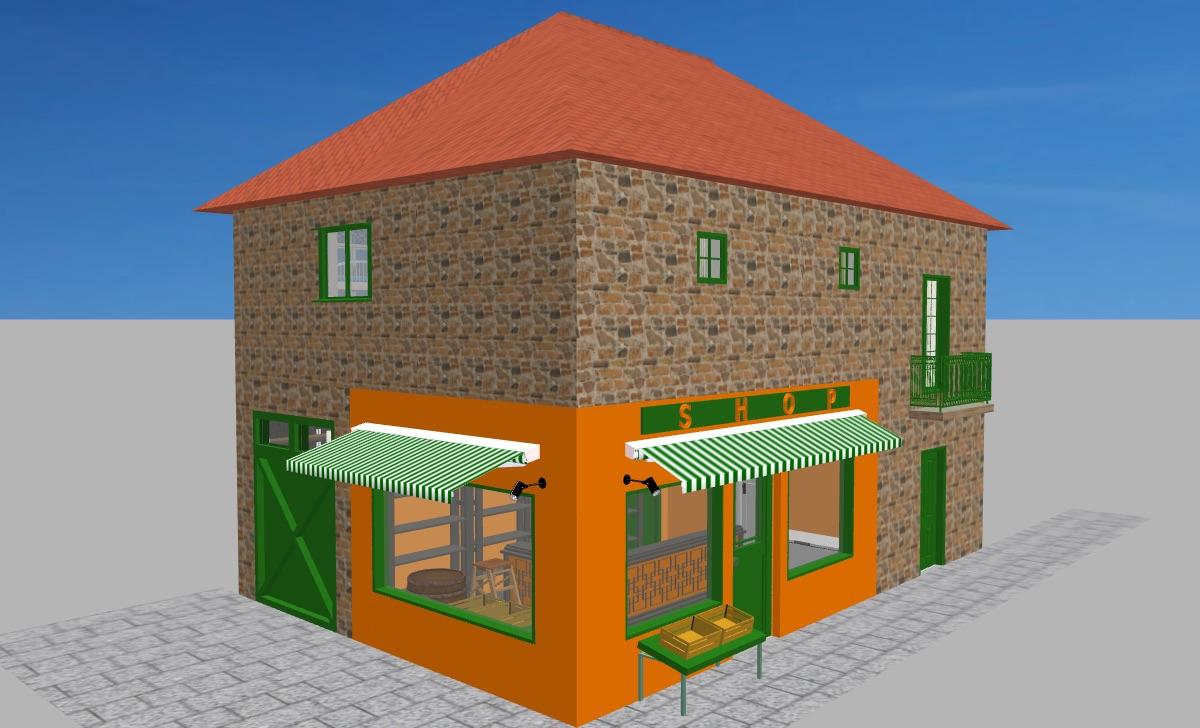
This tip shows how to design a split-level house based on the “shop-house” example shown below and available in the file TheShopAroundTheCorner.sh3d (6.3 MB – designed by eTeks and distributed under CC-BY license).
Similarly to the tip How to design a mezzanine, it also explains some important features about levels management in Sweet Home 3D.
 |
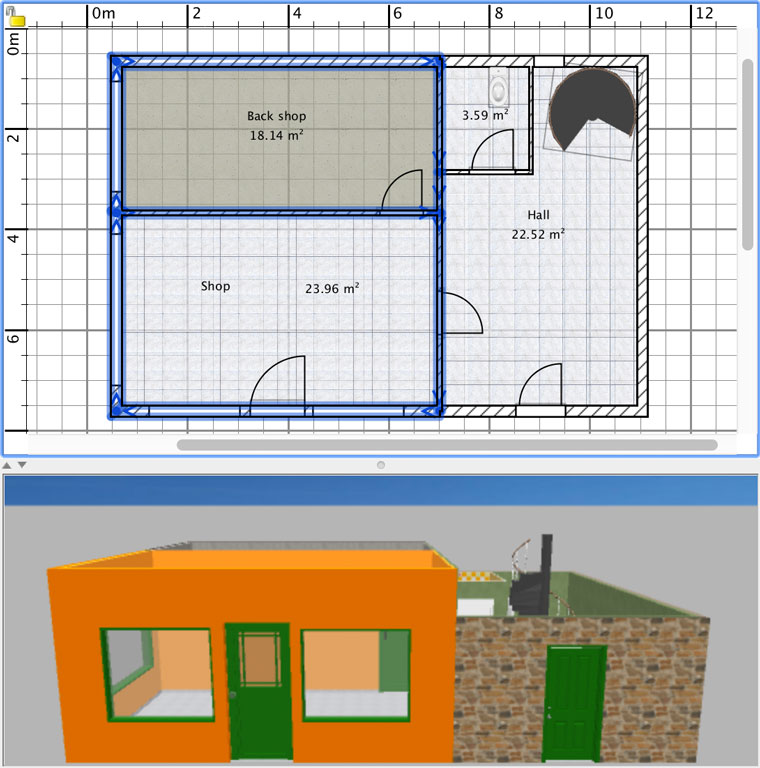
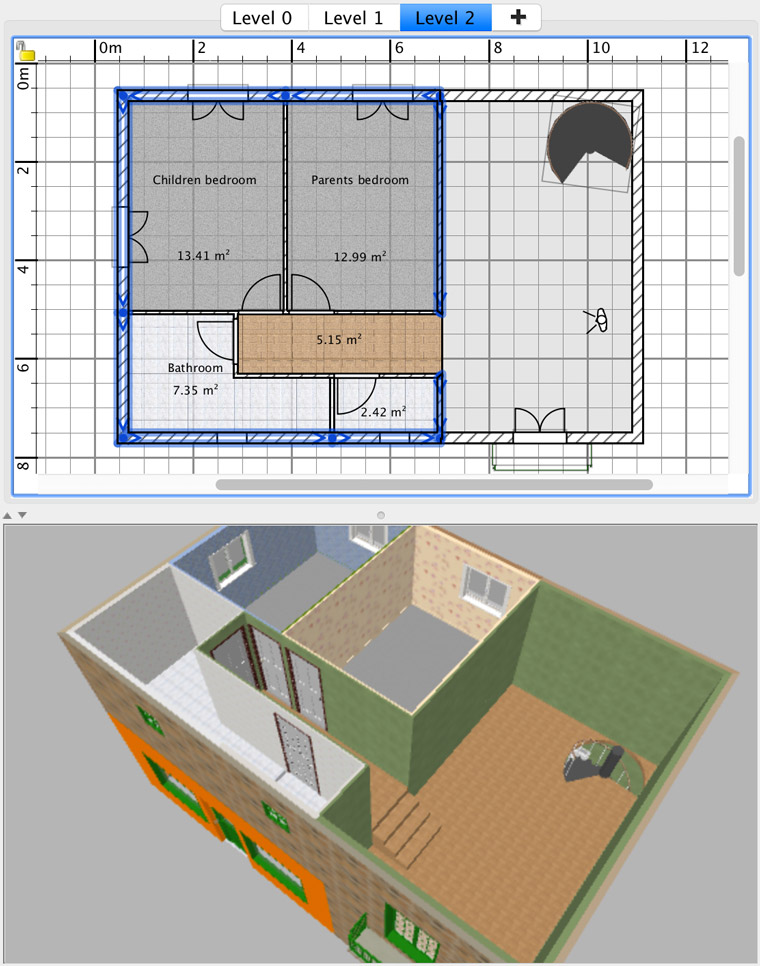
The image on the right shows the same house with half transparent walls and rooms, to help you visualize the two different levels at the second floor of this house, due to the higher ceiling of the shop on the left side. Walls and rooms transparency can be changed with the Walls transparency setting available in the 3D modification pane displayed by the 3D View > Modify 3D view… menu item.
Drawing the first floor
Draw walls and rooms of the first floor at their default height (250 cm or 96 inches), without showing ceilings for the moment.
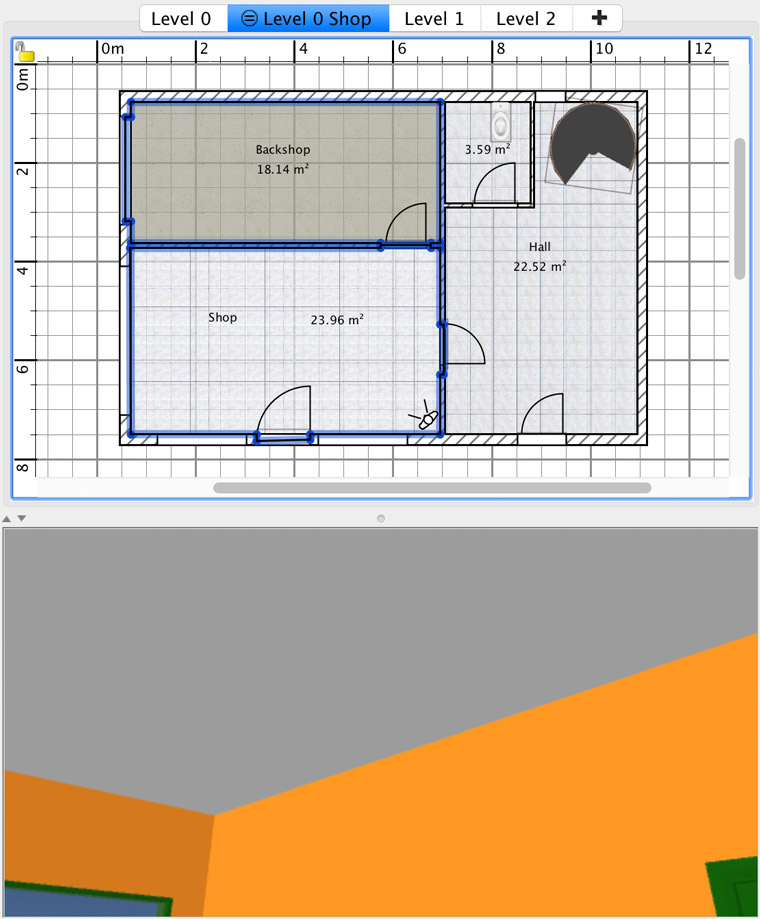
Then select the walls around the shop and the backshop to set their height at 330 cm with the modification pane displayed by the Plan > Modify walls menu item. The right part of the house remains 250 cm high as shown in the following screenshot.
Using two different heights of walls on the first floor implies that the floor above it will require 2 levels at different elevations.
Note that the height of the staircase in the hall is set to fit to 250 cm high levels like most staircases available in Sweet Home 3D free 3D models. Read this tip for more information about staircases.
Adding levels
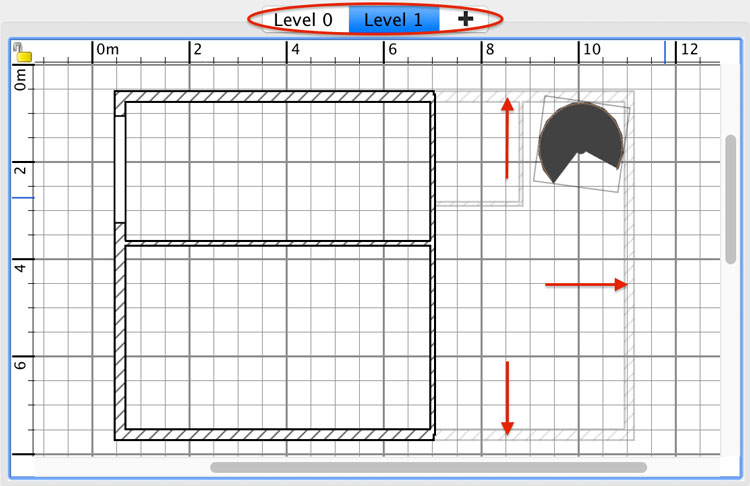
Select Plan > Add level menu item to create a new level. Level 0 and Level 1 tabs now appear above the plan as show below. Level 0 contains what you draw until now in the default level and Level 1 is automatically selected and displayed in the plan. All the walls and objects of Level 0 with a height that goes beyond the elevation of Level 1 are visible in the new level and drawn in their default color. In our example it’s the case for the 330 cm high walls on the left and the staircase. All the walls of Level 0 with a height lower than the elevation of Level 1, like the ones pointed with some arrows below, are drawn in light grey to help you draw the level above.
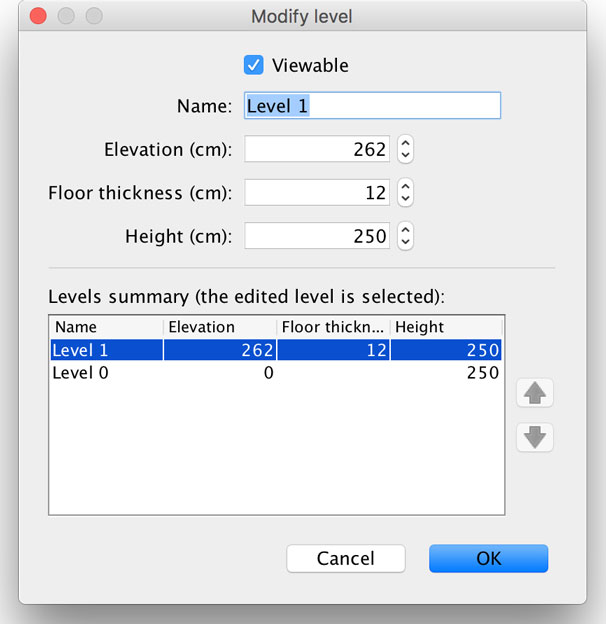
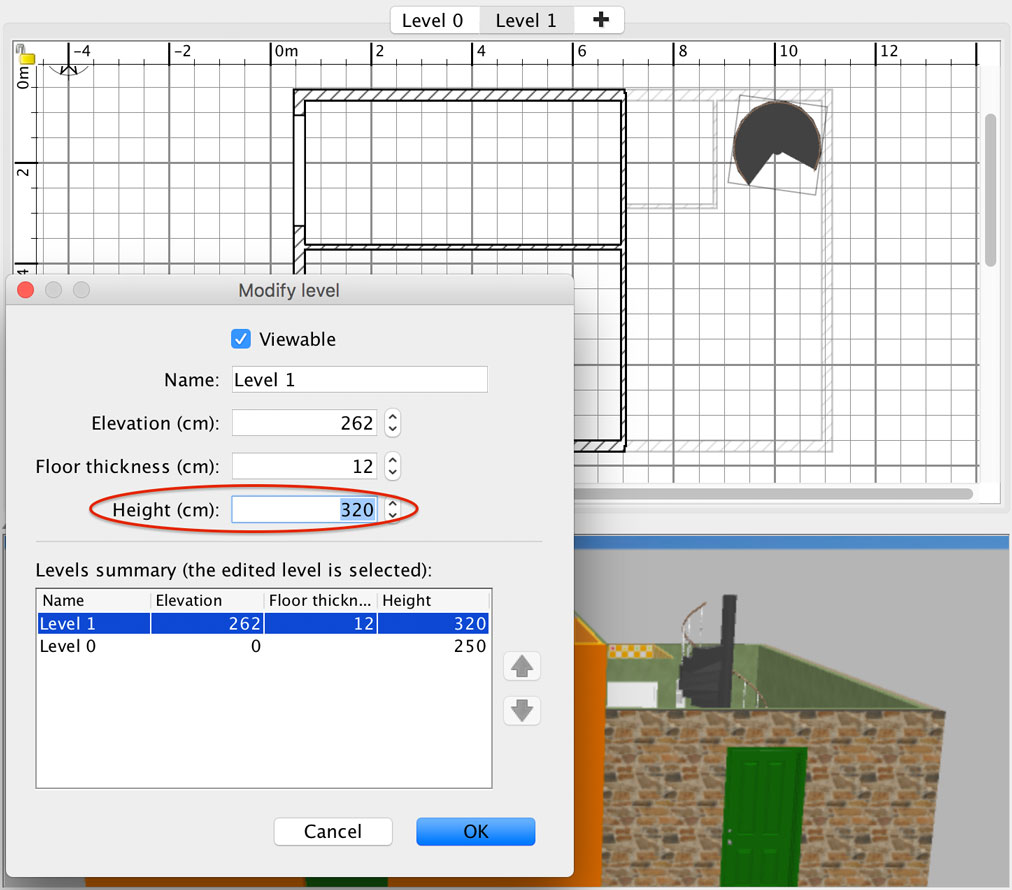
Choose Plan > Modify level… menu item, or double click on Level 1 tab, to display the modification pane of the selected level.
You may notice that:
- The default Height of a new level is 250 cm (or 96 inches) like default walls height. This height is only used as the elevation of the ceiling of a room (rooms drawn with Create rooms tool). The height of walls you draw may be equal, smaller or higher than the height of a level, and this height is set in the walls modification pane.
- The default Floor thickness of a new level is 12 cm.
- The default Elevation of a new level is 262 cm . The elevation of a level is the height of its floor on which furniture is placed. But the bottom of the walls of a level is at the elevation of that level minus its floor thickness to join nicely with walls at lower levels when you use default values.
The elevation of a level may also be negative to design a basement or foundations.
Customizing levels
Once understood the principles of levels, enter your own values to customize levels.
In our example, Level 1 is the lowest level of the second floor and will be used to design the part of the house above the hall which is 250 cm high.
Therefore, keep its Elevation unchanged with a value of 262 cm (250 cm high + 12 cm default floor thickness).
But change its Height to ensure that ceilings of Level 1 will be at the same elevation as the upcoming Level 2. This height is 320 cm here.
Once you close the level modification pane, no change appears in the plan until you draw walls or add objects to that level.
Draw now the walls of Level 1 using the walls in light grey as guides. Modify the new walls with Plan > Modify walls menu item to increase their height at 320 cm like the height of their level. Don’t forget to also set their thickness with the same value set for the walls created at Level 0 (22 cm in our example).
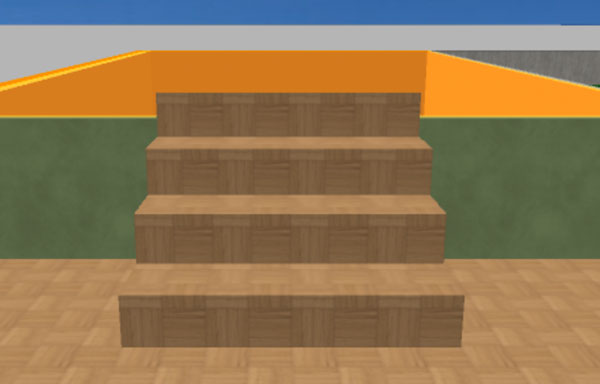
Create a room, customize it and build a staircase which will bring to the upcoming Level 2.
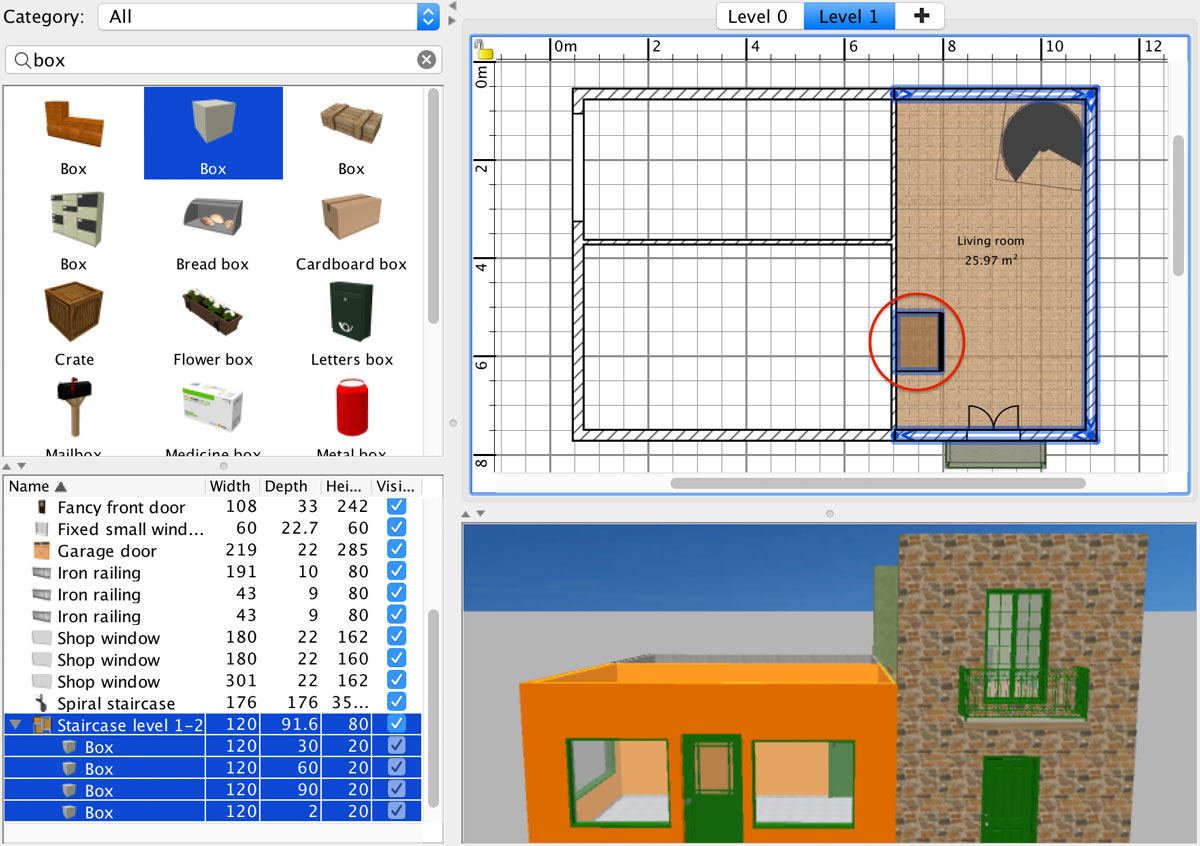
This small staircase is a group of simple boxes, and its height is:
330 cm (height of the shop)
+ 12 cm (floor thickness of Level 2)
– 250 cm (height of the hall)
– 12 cm (floor thickness of Level 1)
= 80 cm = 4 steps with a height 20 cm.
Choose Add level item in Plan menu or press the tab showing a plus sign above the plan to create a new level.
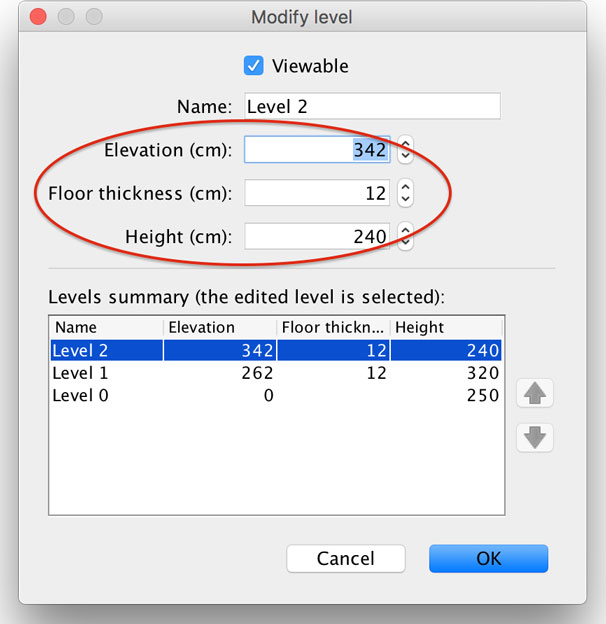
A new Level 2 tab appears. Double click on it, or select Plan > Modify level menu item to update Level2.
The initial elevation of this level is equivalent to equal 524 cm, i.e. 262 cm (elevation of Level 1) + 250 cm (height of new walls set in preferences) + 12 cm (floor thickness of new levels set in preferences).
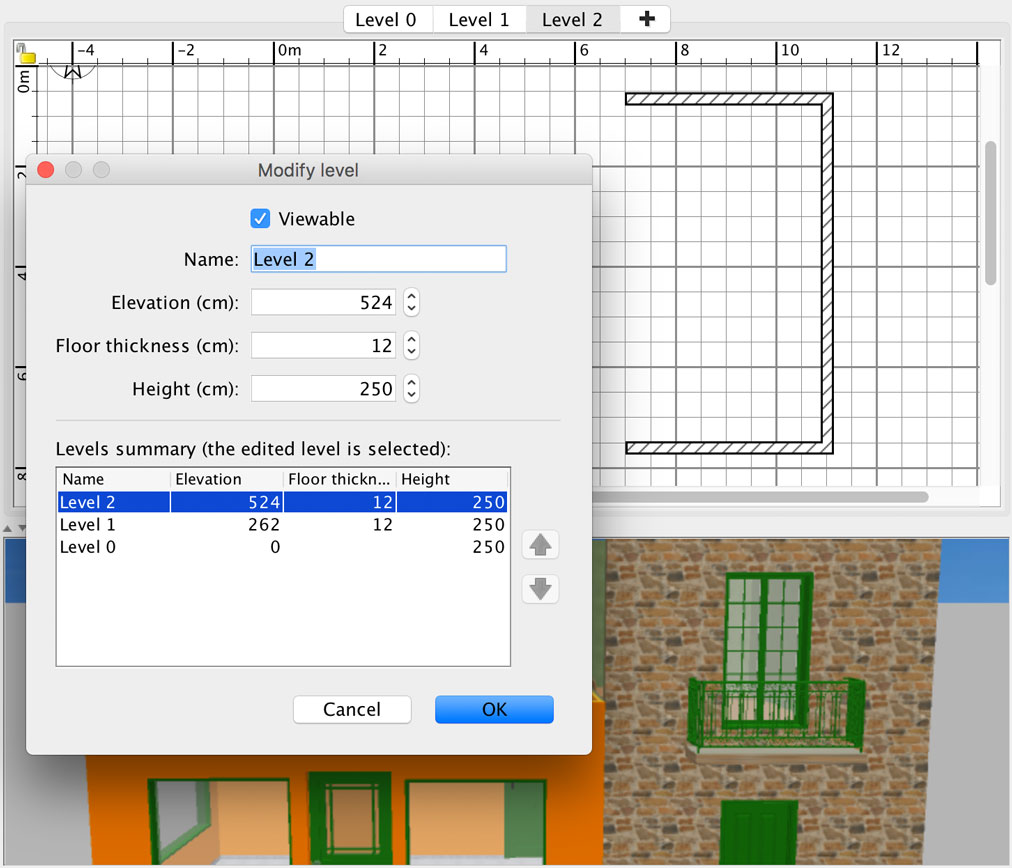
Level 2 walls and objects are placed above the shop on the left which is 330 cm high. Adding 12 cm as floor thickness, enter 342 cm as Level 2 elevation.
The height of Level 2 must match the height of Level 1 which was set 320 cm high. As there’s a 80 cm height difference between the two levels, enter 320 – 80 = 240 cm as Height for Level 2.
Walls drawn at Level 2 will have to be also 240 cm high too (you may change the height of new walls in preferences pane or draw walls at the current default height and change it afterwards).
Now, draw the walls of Level 2.
Unfortunately, Sweet Home 3D draws only walls of the previous level in light grey. Therefore, the shop walls drawn at Level 0won’t appear at Level 2, because its previous level is Level 1 and not Level 0. But, you can use this simple tip is to ensure the exterior walls at Level 2 will be at the right place: copy the exterior walls around the shop and the backshop at Level 0 and paste them in Level 2, and change their height to 240 cm.
Finally, complete your house with interior walls at the same height, doors, windows and rooms.
If you display the ceiling of the rooms of the second floor drawn at Level 1 and Level 2, their elevation will be the same as shown below.
Managing the ceiling at first floor
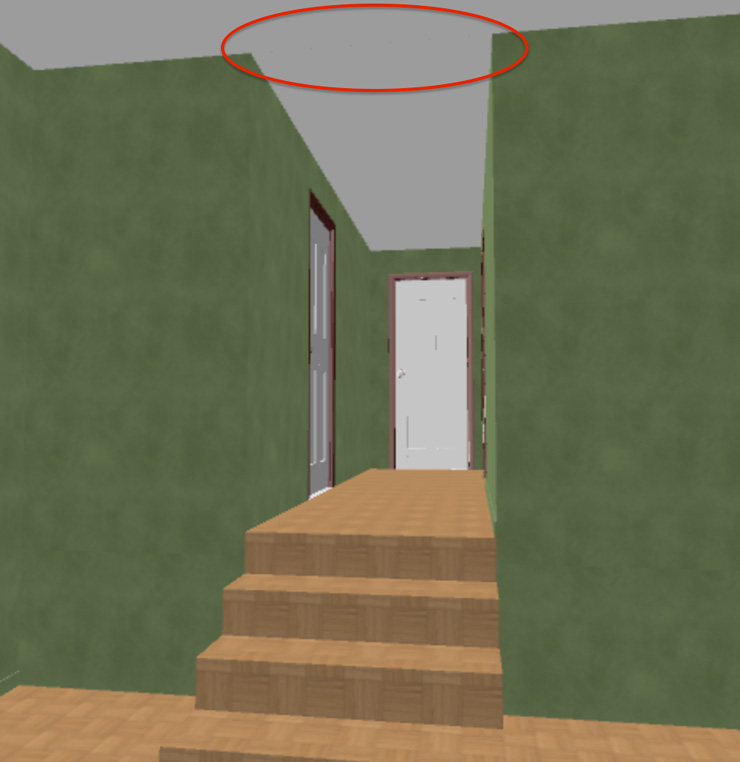
If you move the virtual visitor at the first floor and look upwards to view its ceiling with the option 3D view > View all levelsselected, you’ll see that it shows the drawing and the textures of room floors at Level 1 and Level 2. This is the default behavior of Sweet Home 3D when the Display ceiling option of the rooms in a lower level is not selected.
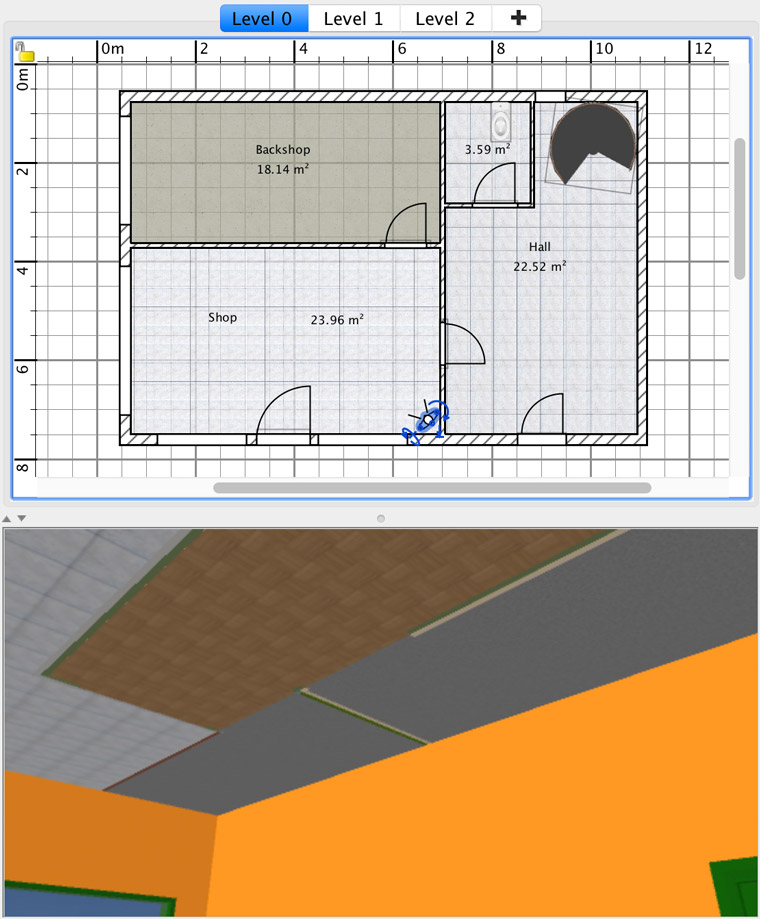
If you select the Display ceiling option for the 4 rooms at Level 0 to get a nicer result, only the ceiling of the rooms on the right of the plan will be at the correct 250 cm elevation which is equal to the height of Level 0. In Sweet Home 3D, the elevation of the room ceiling is equal to the elevation of the level in which this room was drawn + the height of that level (except for the highest level, where the elevation of ceiling corners are computed according to the closest wall ends).
If you want the ceiling of the Shop and Backshop rooms to be at a higher 330 cm elevation, you’ll have to add an additional level at the same elevation as Level 0, but this time with a height equal to 330 cm.
Therefore, ensure Level 0 tab is selected, choose the Add level at same elevation item in Plan menu and modify this new level and change its height to 330 cm. To apply this height to the ceiling of the rooms, just cut and paste them, ensuring that the 330 cm high level is selected.
You have now a perfect result for the shop and backshop ceilings.
Add furniture and a roof to your house, and be ready to welcome the first customers of your sweet little shop around the corner.
Note that levels at same elevation can also be very useful when you want to test different furniture options in a room: you may create a first level that will contain walls, rooms and fixed objects, then create two levels at same elevation and add furniture to them, hiding the furniture of one or the other level with the Plan > Make level unviewable menu item.
At last, if you want to deepen the use of levels, you can view the video How to design a multi level house on a slope based on MultiLevelHouseOnSlope.sh3d file (3.7 MB), read in the forum this presentation of levels which shows how to design raised floors and false ceilings, or this thread where Ceciliabr and Okh propose a clever tip to embed lights in a ceiling thanks to the floor thickness feature.
Leave a Reply